


Bram Stout
@stoutnl.bsky.social
Working on animations (including Minecraft animations) for over 10 years. Doing things like story writing, CG cinematography, CG pipeline development, rigging, and consulting.
Creator of MiEx, a Minecraft world exporter.
https://bramstout.nl
Creator of MiEx, a Minecraft world exporter.
https://bramstout.nl
Spent the first half of my day setting up a project with an existing build system.
Spent the second half of my day writing my own build system in Python...
Spent the second half of my day writing my own build system in Python...
![Screenshot of the build script run by the custom build system.
Code shown:
import build.build as build
build.Package(
name="...",
version="0.1.0",
dependencies=[
build.Dependency(
packageName="..."
)
]
)
build.addFolder("...")
if __name__ == "__main__":
build.buildAllPackages()](https://cdn.bsky.app/img/feed_thumbnail/plain/did:plc:byffauiekbu6vqteulja226i/bafkreieqb4crk7tvlxejkjmzoq6mnrulysotzh2ti7usdysem3ko7x2foy@jpeg)
October 10, 2025 at 6:37 AM
Spent the first half of my day setting up a project with an existing build system.
Spent the second half of my day writing my own build system in Python...
Spent the second half of my day writing my own build system in Python...
Also, did you know that MiEx can calculate MC-style ambient occlusion and export it out as an extra vertex colour set? This is EEVEE with just ambient world lighting, no shadows or GI
#minecraft
#minecraft

June 29, 2025 at 10:35 PM
Also, did you know that MiEx can calculate MC-style ambient occlusion and export it out as an extra vertex colour set? This is EEVEE with just ambient world lighting, no shadows or GI
#minecraft
#minecraft


I recently went to Scotland for a week and brought my camera with me
I've put the rest of the pictures on my website:
bramstout.nl/en/photograp...
#photography #scotland
I've put the rest of the pictures on my website:
bramstout.nl/en/photograp...
#photography #scotland


June 8, 2025 at 9:48 AM
I recently went to Scotland for a week and brought my camera with me
I've put the rest of the pictures on my website:
bramstout.nl/en/photograp...
#photography #scotland
I've put the rest of the pictures on my website:
bramstout.nl/en/photograp...
#photography #scotland
Been working on further customising Autodesk Maya for
@elementanimation.bsky.social , now with a new launcher!
(Play with sound)
@elementanimation.bsky.social , now with a new launcher!
(Play with sound)
May 29, 2025 at 4:23 PM
Been working on further customising Autodesk Maya for
@elementanimation.bsky.social , now with a new launcher!
(Play with sound)
@elementanimation.bsky.social , now with a new launcher!
(Play with sound)


In 2024 @elementanimation.bsky.social switched to using @unrealengine.bsky.social for lighting and rendering. For this, I updated the Element Animation pipeline, which includes an interchange system to get the animations from Maya into Unreal.
Here's a post about it: bramstout.nl/en/work/elem...
Here's a post about it: bramstout.nl/en/work/elem...

April 4, 2025 at 3:01 PM
In 2024 @elementanimation.bsky.social switched to using @unrealengine.bsky.social for lighting and rendering. For this, I updated the Element Animation pipeline, which includes an interchange system to get the animations from Maya into Unreal.
Here's a post about it: bramstout.nl/en/work/elem...
Here's a post about it: bramstout.nl/en/work/elem...
I got to work with @elementanimation.bsky.social to do the lighting for "A Wandering Trader Springs to Life!" for #MinecraftLIVE
I also created a new effects system to handle all of the particles and rewrote the Unreal Engine pipeline
I've written about it here: bramstout.nl/en/work/mine...
I also created a new effects system to handle all of the particles and rewrote the Unreal Engine pipeline
I've written about it here: bramstout.nl/en/work/mine...

March 31, 2025 at 12:42 PM
I got to work with @elementanimation.bsky.social to do the lighting for "A Wandering Trader Springs to Life!" for #MinecraftLIVE
I also created a new effects system to handle all of the particles and rewrote the Unreal Engine pipeline
I've written about it here: bramstout.nl/en/work/mine...
I also created a new effects system to handle all of the particles and rewrote the Unreal Engine pipeline
I've written about it here: bramstout.nl/en/work/mine...
Also my one contribution to the character animation, is adding this singular tear falling from the llama's face

March 23, 2025 at 1:36 AM
Also my one contribution to the character animation, is adding this singular tear falling from the llama's face

March 17, 2025 at 6:14 PM
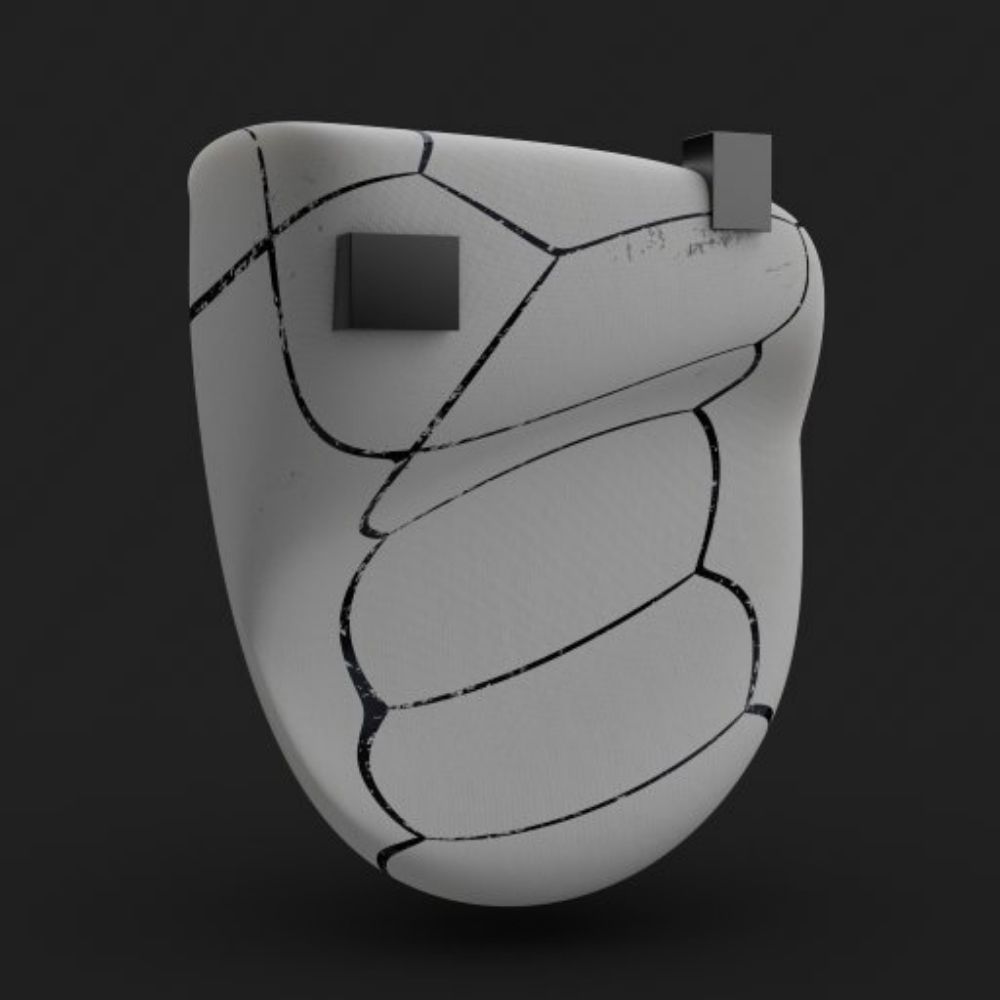
Some more progress on the paint stroke lookdev.
Still need to align the strokes to the surface, work on stability, and add in brush stroke textures.
It's entirely driven by a position pass, from which is spawns surface-stable points which then get rendered to the screen
Still need to align the strokes to the surface, work on stability, and add in brush stroke textures.
It's entirely driven by a position pass, from which is spawns surface-stable points which then get rendered to the screen
February 21, 2025 at 9:56 AM
Some more progress on the paint stroke lookdev.
Still need to align the strokes to the surface, work on stability, and add in brush stroke textures.
It's entirely driven by a position pass, from which is spawns surface-stable points which then get rendered to the screen
Still need to align the strokes to the surface, work on stability, and add in brush stroke textures.
It's entirely driven by a position pass, from which is spawns surface-stable points which then get rendered to the screen
... and so rather than forcing everyone to use the same colour rendering anyways, the design philosophy of LOOCS is to provide a small set of base colour renderings, so that artists can pick the one that fits best and tweak it to get the exact look that they need.

February 17, 2025 at 12:23 PM
... and so rather than forcing everyone to use the same colour rendering anyways, the design philosophy of LOOCS is to provide a small set of base colour renderings, so that artists can pick the one that fits best and tweak it to get the exact look that they need.
All operations work together to provide the final look of Filmic Classic. They provide fundamental characteristics to the colour rendering that give a nice starting point to create your own look. But, those fundamental characteristics aren't always appropriate for every project, ...

February 17, 2025 at 12:23 PM
All operations work together to provide the final look of Filmic Classic. They provide fundamental characteristics to the colour rendering that give a nice starting point to create your own look. But, those fundamental characteristics aren't always appropriate for every project, ...
So, at the end the colour gets converted back to G1 and their saturation remapped so that fully saturated colours remain fully saturated.

February 17, 2025 at 12:23 PM
So, at the end the colour gets converted back to G1 and their saturation remapped so that fully saturated colours remain fully saturated.
Lastly, Filmic Classic uses the G2 gamut, but the display transform takes in the G1 gamut and maps the full G1 gamut into the display gamut. This would limit how saturated the colours from Filmic Classic can show up once put through the display transform.


February 17, 2025 at 12:23 PM
Lastly, Filmic Classic uses the G2 gamut, but the display transform takes in the G1 gamut and maps the full G1 gamut into the display gamut. This would limit how saturated the colours from Filmic Classic can show up once put through the display transform.
This raised dark saturated colours to be brighter, and also lowered bright saturated colours to help keep their saturation for longer. The contrast is only applied on the maximum value, rather than to each channel. This is to preserve saturation and hue.

February 17, 2025 at 12:23 PM
This raised dark saturated colours to be brighter, and also lowered bright saturated colours to help keep their saturation for longer. The contrast is only applied on the maximum value, rather than to each channel. This is to preserve saturation and hue.
Something that I noticed in photographic film that I liked, was that saturated colours were both very saturated but also bright, really making them stand out. To achieve that brightening effect for saturated colours, I reduced the contrast based on the saturation but with a very high contrast pivot


February 17, 2025 at 12:23 PM
Something that I noticed in photographic film that I liked, was that saturated colours were both very saturated but also bright, really making them stand out. To achieve that brightening effect for saturated colours, I reduced the contrast based on the saturation but with a very high contrast pivot
I ended up at a technique where I apply a saturation (combo of the typical saturation and normalised gamma operations), then the tone-map, and then a desaturation. The combination of both types of saturation operations gave me more control over how the hues of colours are affected.

February 17, 2025 at 12:23 PM
I ended up at a technique where I apply a saturation (combo of the typical saturation and normalised gamma operations), then the tone-map, and then a desaturation. The combination of both types of saturation operations gave me more control over how the hues of colours are affected.
For Filmic Classic, I wanted to create something that produces vibrant images with good colour separation. I wanted saturated colours to remain saturated without less saturated colours looking unnatural.


February 17, 2025 at 12:23 PM
For Filmic Classic, I wanted to create something that produces vibrant images with good colour separation. I wanted saturated colours to remain saturated without less saturated colours looking unnatural.
However rather than doing a typical saturation operation, the increase in saturation is handled via a normalised gamma, which increase the saturation but also skews colours towards the primaries, allowing colours to more slowly skew towards the secondaries, creating more separation in the highlights
February 17, 2025 at 12:23 PM
However rather than doing a typical saturation operation, the increase in saturation is handled via a normalised gamma, which increase the saturation but also skews colours towards the primaries, allowing colours to more slowly skew towards the secondaries, creating more separation in the highlights
So, before the desaturation gets applied, colours get more saturated first. The two combine together where less saturated colours roughly keep their saturations while very saturated colours get less saturated.


February 17, 2025 at 12:23 PM
So, before the desaturation gets applied, colours get more saturated first. The two combine together where less saturated colours roughly keep their saturations while very saturated colours get less saturated.
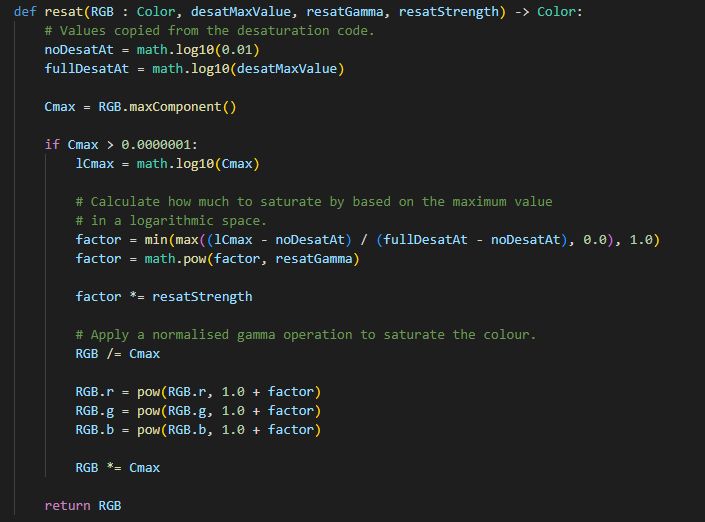
This gives me more control over when the colours go to white and also better reduces the amount that their hues get skewed to the secondaries as they get brighter. While this desaturation works for very saturated colours, less saturated colours end up too desaturated in the highlights.

February 17, 2025 at 12:23 PM
This gives me more control over when the colours go to white and also better reduces the amount that their hues get skewed to the secondaries as they get brighter. While this desaturation works for very saturated colours, less saturated colours end up too desaturated in the highlights.
The tone-mapping is done per-channel, which can create undesirable results for very saturated colours. Some colour renderings solve this by applying a constant desaturation, but for Filmic Classic I decided to variably desaturate the colours based on their max value.


February 17, 2025 at 12:23 PM
The tone-mapping is done per-channel, which can create undesirable results for very saturated colours. Some colour renderings solve this by applying a constant desaturation, but for Filmic Classic I decided to variably desaturate the colours based on their max value.
The curve gets cut off a bit before it goes fully flat to preserve more detail in the highlights and shadows. The highlight section can be moved to change the maximum value for HDR. The shadow section causes the black-point to be raised, so at the end the values get remapped to compensate for that.

February 17, 2025 at 12:23 PM
The curve gets cut off a bit before it goes fully flat to preserve more detail in the highlights and shadows. The highlight section can be moved to change the maximum value for HDR. The shadow section causes the black-point to be raised, so at the end the values get remapped to compensate for that.
Photographic film handles light in a logarithmic way, so for tone-mapping we first get the log of the value, apply the curve, and then the inverse log. The curve is set up in three pieces for full control: a linear section in the middle and two halves of a sigmoid curve on either end.

February 17, 2025 at 12:23 PM
Photographic film handles light in a logarithmic way, so for tone-mapping we first get the log of the value, apply the curve, and then the inverse log. The curve is set up in three pieces for full control: a linear section in the middle and two halves of a sigmoid curve on either end.