


Just A Tinker
@john-gardi.bsky.social
I've always been a tinker.
I started by taking stuff apart.
Then I learned how to put stuff back together, then how to fix it.
It's a way of life for me really.
http://justatinker.com
Note: Solicitors of 𝘢𝘯𝘺 𝘵𝘺𝘱𝘦 will be blocked and/or reported!
I started by taking stuff apart.
Then I learned how to put stuff back together, then how to fix it.
It's a way of life for me really.
http://justatinker.com
Note: Solicitors of 𝘢𝘯𝘺 𝘵𝘺𝘱𝘦 will be blocked and/or reported!
I was thinking, all this nail trimmer needs to be perfect (and I 𝘥𝘰𝘯'𝘵 use that term often) would be if it had a file.
𝘛𝘩𝘦𝘯 I looked on the handle... 🤦
Tinker's tip: Practice make 𝘣𝘦𝘵𝘵𝘦𝘳, perfection is for fools! 🙇
𝘛𝘩𝘦𝘯 I looked on the handle... 🤦
Tinker's tip: Practice make 𝘣𝘦𝘵𝘵𝘦𝘳, perfection is for fools! 🙇

November 30, 2025 at 6:27 PM
I was thinking, all this nail trimmer needs to be perfect (and I 𝘥𝘰𝘯'𝘵 use that term often) would be if it had a file.
𝘛𝘩𝘦𝘯 I looked on the handle... 🤦
Tinker's tip: Practice make 𝘣𝘦𝘵𝘵𝘦𝘳, perfection is for fools! 🙇
𝘛𝘩𝘦𝘯 I looked on the handle... 🤦
Tinker's tip: Practice make 𝘣𝘦𝘵𝘵𝘦𝘳, perfection is for fools! 🙇
@waldo.net My sign of respect from one tool user to another!
Thank you for the tip, they're a good as you said they were!
Thank you for the tip, they're a good as you said they were!

November 30, 2025 at 6:00 PM
@waldo.net My sign of respect from one tool user to another!
Thank you for the tip, they're a good as you said they were!
Thank you for the tip, they're a good as you said they were!
I'm recording an acapela choir concert tonight!

November 30, 2025 at 12:16 AM
I'm recording an acapela choir concert tonight!

Instead of ejecting a payload, the vehicle just extends it where it can get solar power.
When the mission is over, it retracts the payload, closes the fairing & reenters to land by parachute.
They don't even call themselves a launch company but instead will focus on manufacturing & pharmaceuticals.
When the mission is over, it retracts the payload, closes the fairing & reenters to land by parachute.
They don't even call themselves a launch company but instead will focus on manufacturing & pharmaceuticals.

November 29, 2025 at 2:24 AM
Instead of ejecting a payload, the vehicle just extends it where it can get solar power.
When the mission is over, it retracts the payload, closes the fairing & reenters to land by parachute.
They don't even call themselves a launch company but instead will focus on manufacturing & pharmaceuticals.
When the mission is over, it retracts the payload, closes the fairing & reenters to land by parachute.
They don't even call themselves a launch company but instead will focus on manufacturing & pharmaceuticals.
Success on my first try with a smooth plate!
I just changed to smooth plate in the print settigs and it worked!
I just changed to smooth plate in the print settigs and it worked!

November 27, 2025 at 6:21 PM
Success on my first try with a smooth plate!
I just changed to smooth plate in the print settigs and it worked!
I just changed to smooth plate in the print settigs and it worked!
When the only tool you have is a hammer, everything becomes a nail.

November 27, 2025 at 5:32 PM
When the only tool you have is a hammer, everything becomes a nail.
Can the horizontal tube at the end of the arrow be printed without support?

November 27, 2025 at 8:47 AM
Can the horizontal tube at the end of the arrow be printed without support?
So I found out through trial & error that I can print the first layer at .085mm thickness, the slicer rejects anything thinner.
I had to fiddle with line width to get it to print consistently but it works.
I saved .4 grams!
The wing is almost translucent, you can see the Bambu Lab swoosh through it!
I had to fiddle with line width to get it to print consistently but it works.
I saved .4 grams!
The wing is almost translucent, you can see the Bambu Lab swoosh through it!

November 27, 2025 at 7:54 AM
So I found out through trial & error that I can print the first layer at .085mm thickness, the slicer rejects anything thinner.
I had to fiddle with line width to get it to print consistently but it works.
I saved .4 grams!
The wing is almost translucent, you can see the Bambu Lab swoosh through it!
I had to fiddle with line width to get it to print consistently but it works.
I saved .4 grams!
The wing is almost translucent, you can see the Bambu Lab swoosh through it!
Actually, the Parish Hall is a big room about 50 feet square with a stage.
The Church proper is much bigger but but it has big stained glass windows and I didn't want to have to deal with crashing into the pews.
I'd also probably have to get Father Michael to bless the idea (and the plane) first. 😉
The Church proper is much bigger but but it has big stained glass windows and I didn't want to have to deal with crashing into the pews.
I'd also probably have to get Father Michael to bless the idea (and the plane) first. 😉


November 27, 2025 at 6:48 AM
Actually, the Parish Hall is a big room about 50 feet square with a stage.
The Church proper is much bigger but but it has big stained glass windows and I didn't want to have to deal with crashing into the pews.
I'd also probably have to get Father Michael to bless the idea (and the plane) first. 😉
The Church proper is much bigger but but it has big stained glass windows and I didn't want to have to deal with crashing into the pews.
I'd also probably have to get Father Michael to bless the idea (and the plane) first. 😉
🛫RC 1903 Wright Flyer Update🛬
One final touch to my 2nd Wright Flyer, adding a battery mount.
This wasn't as easy as it sounds.
I use the battery's weight to balance the plane and it took quite a few glide tests and a couple of short powered ones to nail down where it needed to go.
𝘛𝘩𝘦𝘯 it was easy!
One final touch to my 2nd Wright Flyer, adding a battery mount.
This wasn't as easy as it sounds.
I use the battery's weight to balance the plane and it took quite a few glide tests and a couple of short powered ones to nail down where it needed to go.
𝘛𝘩𝘦𝘯 it was easy!


November 26, 2025 at 3:43 AM
🛫RC 1903 Wright Flyer Update🛬
One final touch to my 2nd Wright Flyer, adding a battery mount.
This wasn't as easy as it sounds.
I use the battery's weight to balance the plane and it took quite a few glide tests and a couple of short powered ones to nail down where it needed to go.
𝘛𝘩𝘦𝘯 it was easy!
One final touch to my 2nd Wright Flyer, adding a battery mount.
This wasn't as easy as it sounds.
I use the battery's weight to balance the plane and it took quite a few glide tests and a couple of short powered ones to nail down where it needed to go.
𝘛𝘩𝘦𝘯 it was easy!
Even a dyslexic with t877777777777777u7666666 (Greetings from Artemis🐈⬛) 10% vision can be amazing.
I recently got a 3D printed remote control 1903 Wright Brothers Flyer in the air!
I gutted a $30 toy RC plane to get the gear for my plane.
I may not be able to be a pilot so I make planes I 𝘤𝘢𝘯 fly. 🧑✈️
I recently got a 3D printed remote control 1903 Wright Brothers Flyer in the air!
I gutted a $30 toy RC plane to get the gear for my plane.
I may not be able to be a pilot so I make planes I 𝘤𝘢𝘯 fly. 🧑✈️
November 25, 2025 at 4:15 PM
Even a dyslexic with t877777777777777u7666666 (Greetings from Artemis🐈⬛) 10% vision can be amazing.
I recently got a 3D printed remote control 1903 Wright Brothers Flyer in the air!
I gutted a $30 toy RC plane to get the gear for my plane.
I may not be able to be a pilot so I make planes I 𝘤𝘢𝘯 fly. 🧑✈️
I recently got a 3D printed remote control 1903 Wright Brothers Flyer in the air!
I gutted a $30 toy RC plane to get the gear for my plane.
I may not be able to be a pilot so I make planes I 𝘤𝘢𝘯 fly. 🧑✈️
I just noticed that there's an 'Add Custom G-Code' menu item just below 'Add Pause' but it just beings up a blank edit box.
Would that be useful? 🤷
Would that be useful? 🤷

November 24, 2025 at 10:31 PM
I just noticed that there's an 'Add Custom G-Code' menu item just below 'Add Pause' but it just beings up a blank edit box.
Would that be useful? 🤷
Would that be useful? 🤷
After slicing, move the right layer slider to where you want a pause, right click and select 'Add Pause'.
TBH, I found it by accident. 😉
TBH, I found it by accident. 😉

November 24, 2025 at 10:14 PM
After slicing, move the right layer slider to where you want a pause, right click and select 'Add Pause'.
TBH, I found it by accident. 😉
TBH, I found it by accident. 😉
I like to get into the weeds with my gear too.
I built my first computer, a Sinclair ZX-81, as a kit in the early '80s.
It came with 512 𝘣𝘺𝘵𝘦𝘴 of memory!
To get more RAM I hacked a hole in the top and stacked 8 2K RAM chips with their chip select lines bent out then passed through a 3 to 8 decoder.
I built my first computer, a Sinclair ZX-81, as a kit in the early '80s.
It came with 512 𝘣𝘺𝘵𝘦𝘴 of memory!
To get more RAM I hacked a hole in the top and stacked 8 2K RAM chips with their chip select lines bent out then passed through a 3 to 8 decoder.


November 24, 2025 at 10:03 PM
I like to get into the weeds with my gear too.
I built my first computer, a Sinclair ZX-81, as a kit in the early '80s.
It came with 512 𝘣𝘺𝘵𝘦𝘴 of memory!
To get more RAM I hacked a hole in the top and stacked 8 2K RAM chips with their chip select lines bent out then passed through a 3 to 8 decoder.
I built my first computer, a Sinclair ZX-81, as a kit in the early '80s.
It came with 512 𝘣𝘺𝘵𝘦𝘴 of memory!
To get more RAM I hacked a hole in the top and stacked 8 2K RAM chips with their chip select lines bent out then passed through a 3 to 8 decoder.
I can at least do layer pauses to change filaments in Bambu Studio like I did with the two colour Wright Flyer.

November 24, 2025 at 9:55 PM
I can at least do layer pauses to change filaments in Bambu Studio like I did with the two colour Wright Flyer.
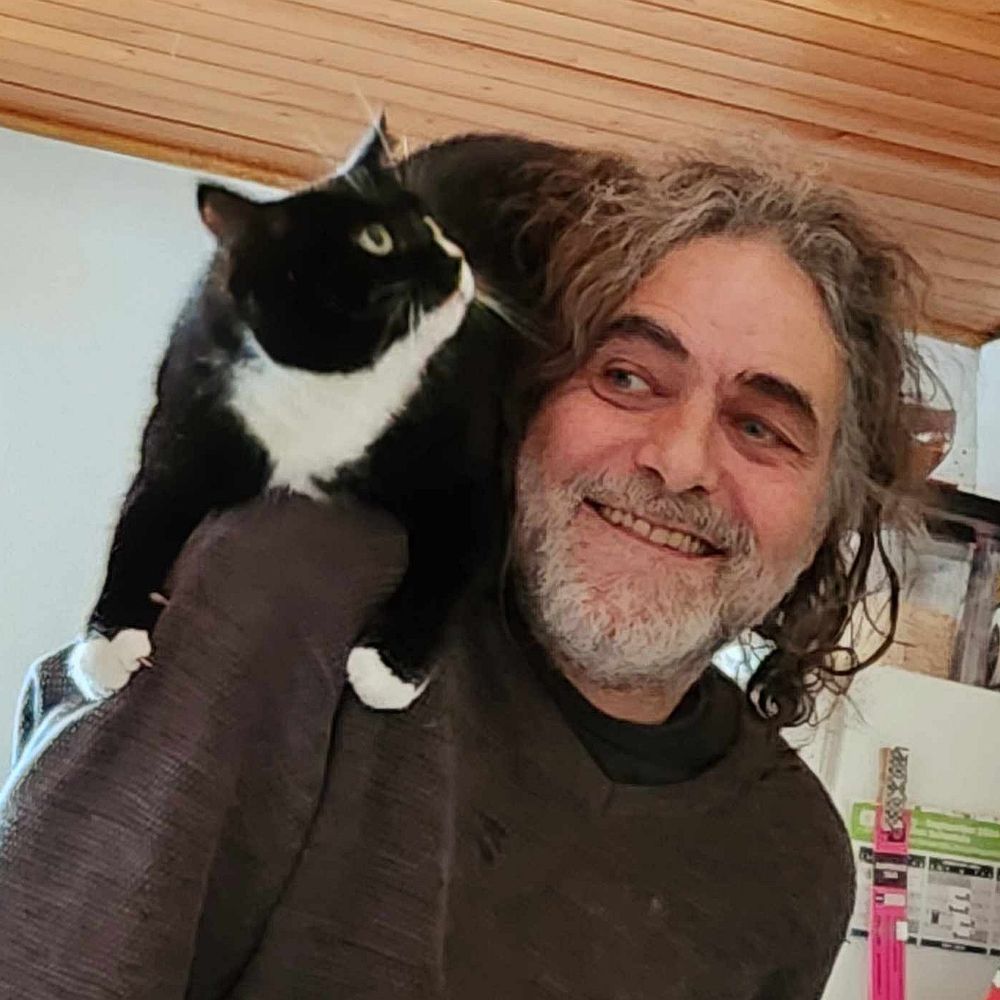
It's cat kind of day. 💁

November 24, 2025 at 8:28 PM
It's cat kind of day. 💁

That's how I learned how to drain a foundation in residential architecture.
Interesting that we don't seem to call it that in Canada. 🤔
Interesting that we don't seem to call it that in Canada. 🤔

November 23, 2025 at 3:07 AM
That's how I learned how to drain a foundation in residential architecture.
Interesting that we don't seem to call it that in Canada. 🤔
Interesting that we don't seem to call it that in Canada. 🤔
It's a 𝘛𝘩𝘳𝘦𝘦 𝘚𝘵𝘰𝘰𝘨𝘦𝘴 level foreign policy scandal! 😝🤘

November 23, 2025 at 1:11 AM
It's a 𝘛𝘩𝘳𝘦𝘦 𝘚𝘵𝘰𝘰𝘨𝘦𝘴 level foreign policy scandal! 😝🤘
Victory!
This was my first successful flight test of my RC 1903 Wright Flyer!
During taxi tests I realized I'd gotten the motors positions reversed and had to swap them.
After a few glide tests onto the couch I decided to go for it.
I did as good as the original Wright Brother first flight at least!
This was my first successful flight test of my RC 1903 Wright Flyer!
During taxi tests I realized I'd gotten the motors positions reversed and had to swap them.
After a few glide tests onto the couch I decided to go for it.
I did as good as the original Wright Brother first flight at least!
November 22, 2025 at 8:49 PM
Victory!
This was my first successful flight test of my RC 1903 Wright Flyer!
During taxi tests I realized I'd gotten the motors positions reversed and had to swap them.
After a few glide tests onto the couch I decided to go for it.
I did as good as the original Wright Brother first flight at least!
This was my first successful flight test of my RC 1903 Wright Flyer!
During taxi tests I realized I'd gotten the motors positions reversed and had to swap them.
After a few glide tests onto the couch I decided to go for it.
I did as good as the original Wright Brother first flight at least!
I'm 𝘷𝘦𝘳𝘺 pleased with how this version of my Wright Flyer turned out.
The X shaped crosswires I added on a lark actually made the airframe a 𝘭𝘰𝘵 stiffer and stronger.
When I glued the plane together everything went rigid with the wings as tight as a drum.
I could bounce a dime off them... so I did!😁
The X shaped crosswires I added on a lark actually made the airframe a 𝘭𝘰𝘵 stiffer and stronger.
When I glued the plane together everything went rigid with the wings as tight as a drum.
I could bounce a dime off them... so I did!😁
November 22, 2025 at 7:39 PM
I'm 𝘷𝘦𝘳𝘺 pleased with how this version of my Wright Flyer turned out.
The X shaped crosswires I added on a lark actually made the airframe a 𝘭𝘰𝘵 stiffer and stronger.
When I glued the plane together everything went rigid with the wings as tight as a drum.
I could bounce a dime off them... so I did!😁
The X shaped crosswires I added on a lark actually made the airframe a 𝘭𝘰𝘵 stiffer and stronger.
When I glued the plane together everything went rigid with the wings as tight as a drum.
I could bounce a dime off them... so I did!😁
𝘛𝘩𝘪𝘴 is the result of the orange demagogue's deregulation and intervention.
November 22, 2025 at 5:53 PM
𝘛𝘩𝘪𝘴 is the result of the orange demagogue's deregulation and intervention.
🛫RC 1903 Wright Flyer Update🛬
After a few weeks of revisions & modification, my second flight 𝘤𝘢𝘱𝘢𝘣𝘭𝘦 Wright Flyer is glued together and ready for testing!
Everything but the RC gear is 3D printed.
You can see the differences between the original model and my version in the 3D printer plate images.
After a few weeks of revisions & modification, my second flight 𝘤𝘢𝘱𝘢𝘣𝘭𝘦 Wright Flyer is glued together and ready for testing!
Everything but the RC gear is 3D printed.
You can see the differences between the original model and my version in the 3D printer plate images.


November 22, 2025 at 5:42 PM
🛫RC 1903 Wright Flyer Update🛬
After a few weeks of revisions & modification, my second flight 𝘤𝘢𝘱𝘢𝘣𝘭𝘦 Wright Flyer is glued together and ready for testing!
Everything but the RC gear is 3D printed.
You can see the differences between the original model and my version in the 3D printer plate images.
After a few weeks of revisions & modification, my second flight 𝘤𝘢𝘱𝘢𝘣𝘭𝘦 Wright Flyer is glued together and ready for testing!
Everything but the RC gear is 3D printed.
You can see the differences between the original model and my version in the 3D printer plate images.
@astrokatie.com: I'm going back to the roots of aviation by making a remote control 1903 Wright Flyer!
My current version has a wingspan of 7 in. (18.5cm) and weighs 9 grams with its battery.
This is my second attempt at making a 3D printed RC plane after the Avro Arrow.
Almost ready to flight test.
My current version has a wingspan of 7 in. (18.5cm) and weighs 9 grams with its battery.
This is my second attempt at making a 3D printed RC plane after the Avro Arrow.
Almost ready to flight test.


November 21, 2025 at 4:35 AM
@astrokatie.com: I'm going back to the roots of aviation by making a remote control 1903 Wright Flyer!
My current version has a wingspan of 7 in. (18.5cm) and weighs 9 grams with its battery.
This is my second attempt at making a 3D printed RC plane after the Avro Arrow.
Almost ready to flight test.
My current version has a wingspan of 7 in. (18.5cm) and weighs 9 grams with its battery.
This is my second attempt at making a 3D printed RC plane after the Avro Arrow.
Almost ready to flight test.