Richard Harrington, PMP
banner
thinktap.bsky.social
Richard Harrington, PMP
@thinktap.bsky.social
I'm a visual storyteller exploring the fusion of photography and video. I help empower creativity with AI. Husband & father | ThinkTAP
Everything in Its Right Place in Adobe After Effects
Stop eyeballing layouts. The Align & Distribute panel snaps layers into clean grids and even spacing in seconds—no rulers, no guesswork. The essentials * You need at least two layers to align, and at least three layers to distribute. * Open it via Window > Align & Distribute, then click the icon that matches the alignment or distribution you want. * Aligning to an edge? First position one “hero” layer where you want it, then select all and choose Align Left/Right/Top/Bottom. After Effects uses the selected object that already “fits” the target edge as the anchor, pulling the others to match. * Distribute spreads layers evenly between the extremes: top ↔ bottom or left ↔ right of the outermost selected layers. * Locked layers are ignored (they won’t budge). * For predictable spacing, work with similarly sized layers—distribution measures layer bounds. A 60-second layout recipe * Rough in your layers where they belong. * Pick your edge anchor (move one layer to the perfect spot). * Select all → click an Align icon (e.g., Align Left). * With all still selected, click a Distribute icon (e.g., Distribute Vertical Centers) to even out gaps. * Nudge as needed with arrow keys, then lock key elements and repeat for the next row/column. Pro tips & pitfalls * Use guides + snapping for quick checks; you’ll see misalignments instantly. * If sizes vary wildly, precompose related elements or put them in identical shape/text boxes for more consistent distribution. * Want one oddball to stay put? Lock it before aligning the rest. * After you land a great layout, save a Workspace so the panel’s always handy. Clean edges and consistent spacing signal professionalism. Make Align & Distribute part of your muscle memory and your comps will look intentional—not accidental.
dlvr.it
November 25, 2025 at 2:06 PM
The People You’ll Meet Online (and How to Navigate Them)
I’ve been publishing on the internet since the dial-up days. Across forums, blogs, and now a dozen social platforms, one truth sticks: you can’t reach—or help—everyone. That’s not defeatist; it’s strategy. Know who you serve, meet them where they are, and focus your energy where it has the greatest impact. Target Audience Who you want. Clearly define. Never lose sight. More targeted is better. Write down your ideal reader/viewer: role, goals, pain points, favorite platforms, and what “success” looks like for them. Use it daily: Before you post, ask: Does this help my person do their job better or create with more confidence? If no, save it for later. Quick exercise: Draft a 3-line audience statement: I help [who] achieve [outcome] by teaching [topics]. Thought Leaders You’ll cross paths with people you admire—and sometimes you’ll become their peer. Treat them with respect. * Amplify the good: Share their work with context (“Why this matters”). * Engage with value: Add a concise insight or example; avoid “nice post” fluff. * Protect your voice: Admire, don’t imitate. Your audience follows you for your point of view. Template: “Loved this thread from @X on [topic]. Key takeaway I’m applying: [specific step]. Here’s how it performed in my workflow…” Real-World Humans Random, genuine people you never intended to interact with will find your content. Content travels; context doesn’t always. * Assume good intent first. Clarify before correcting. * Be kind and brief. Don’t open ten tabs of debate; offer one helpful pointer and a next step. * Remember overlap: Your tip for editors might land with photographers—welcome them. Script: “Appreciate you stopping by. If you’re doing [their context], this resource may fit better: [hint].” “Jedi Masters” I love Star Wars, but these aren’t the mentors you’re looking for. They speak in galaxy-sized jargon to prove how smart they are. * Do not engage. You won’t win, and your audience won’t benefit. * Boundary: “Thanks for the perspective. I’m keeping this thread practical for working creators.” Clowns They chase attention through mockery, often at someone else’s expense—including yours. * Don’t be the show. No quote-tweets, no duets, no fuel. * House rules: Delete if it derails learning; don’t memorialize it with screenshots. Policy line: “We keep it useful and respectful here. Off-topic or performative replies get removed.” Trolls The other group to avoid. They look for fights, swarm in packs, and escalate fast. In today’s climate, this is the group that worries me most. * Safety > debate. Mute, block, report—then move on. * Prevention: Clear community guidelines pinned. * Positioning: I avoid politics on my channels; I do speak about ethics, credit, fair pay, and consent—because those help creators work better. Crisis drill: If a pile-on starts, pause posting, lock replies, post one clarifying statement, then go quiet and document. Balance Your Online Life * Remember your goals. Every post should tie back to audience outcomes. * Don’t try to change the world. Change the next project for one person who trusts you. * Do connect and add value. Teach something small and actionable every time. Weekly cadence: Listen (10 min) → Follow & note (10 min) → Curate (3 shares) → Help (5 answers) → Create (2 original pieces). Repeat. The Wrap Your energy is finite. Aim it at the people you can actually help, protect your focus from time-wasters, and keep your content useful, kind, and consistent. That’s how you build a durable presence—and a community you’re proud to serve.
dlvr.it
November 24, 2025 at 7:57 PM
The Video Director Needs to Be Confident (Without Being a Jerk)
Clients hire certainty. Crews follow clarity. Video is a team sport, and on set the team needs a captain—a director who can turn vision into decisions under pressure. You can be thoughtful and still be decisive. In fact, that’s the job. Confidence isn’t pretending to know everything. It’s showing you have a plan, a backup plan, and the composure to pick one in real time. Preparation Makes Confidence Walk in with these five packets and your day gets calmer: * One-Sentence Story: What this piece must make the audience feel or do. (Say it at breakfast. Repeat at lunch.) * Coverage Priorities: Must-haves, nice-to-haves, and stretch shots. When time shrinks, you already know what to cut. * Shot Plan & Decision Ladder: A/ B options for lighting, blocking, and lenses; who decides what (you, DP, AD, client). * Risk Map: Three likely problems (weather, talent, tech). Mitigation and owners are preassigned. * Comms Cadence: 5-minute crew huddle at call, after lunch, and before company move; single point for approvals. On-Set Behaviors That Project Calm * Use command phrases that reduce ambiguity: * “Here’s the plan for the next 20 minutes…” * “Two options: A gets us performance; B gets us coverage. I recommend A.” * “We have it. Moving on.” * Decide fast, adjust later: Momentum beats perfection. Get the take that serves the edit, then refine if time allows. * Protect performance: If the actor is hot, keep rolling. Adjust lights between takes, not during. * Delegate visibly: “AD owns time. DP owns the picture. Mixer owns intelligibility. Flag issues early.” * Close loops: Summarize decisions out loud so everyone resets in the same direction. When You Don’t Know (Yet) You will hit new problems—every project, every week. Do this: * Name the problem in plain English. * Time-box a solution window: “Give me 10 minutes.” * Spin up A/B: “If we’re not good by 11:10, we pivot to handheld and adjust blocking.” * Assign owners: “DP tests ISO at 800/1250; Gaffer preps negative fill; AD updates schedule.” * Communicate back on the minute, even if the update is “Plan B now.” Banned phrase: “I don’t know.” Better: “I’ll find out by 10:45 and report back with options.” The Director’s Confidence Kit * Printed call sheet + shot list + coverage matrix * Lookbook & references (so debates end quickly) * Backup media + checksum workflow * Finish specs (frame size, color space, loudness, captions) to guide decisions on set Common Pitfalls (and the Fix) * Vague vision → Start each block with a 1-line headline; repeat it. * Decision drag → Offer two viable options; recommend one; call the play. * Over-politeness → Be kind and clear. Soft voice, hard decisions. * Learning on the client’s dime → Practice new techniques on test days; use proven methods when money’s on the line. * Endless takes → Define “got it” with your editor’s brain; move on to protect the schedule. Confidence is clarity plus practice under pressure. Be decisive, be specific, and be the calmest person in the room. The work—and your team—will rise to meet you.
dlvr.it
November 23, 2025 at 5:27 PM
Revisting an Old Conference Promo Portrait
While cleaning up a hard drive, I came across this old portrait. Yes... It's pretty cringey. It was made for a Photoshop World conference back in 2003, and we were supposed to create graphics in the style of a Saturday Night Live type open from the era (it was that year's theme). This was back in the heyday of conferences. Book signings... jammed conference rooms. Here's the closest I could find online to that era. Let's see what a modern critic has to say about this wonderful piece of early 2000s design. I guess I’ll ask ChatGPT it’s thoughts The image you’ve shared is a stylized, composite portrait of Richard Harrington, designed to convey a sense of digital creativity, multimedia production, and speed. Here’s a detailed analysis: Let’s continue the analysis… Overall Composition and Theme The artwork merges analog and digital elements, reflecting a professional rooted in traditional media (videography) who has embraced digital transformation. The composition feels cinematic and slightly futuristic, with motion blur and grid overlays giving a sense of forward momentum—symbolizing innovation and progress. Subject and Pose At the center, Richard stands confidently facing the viewer, holding: * A video camera in his left hand (symbolizing media production and storytelling). * A laptop in his right hand displaying an image of a “Photoshop for Video” book cover—linking him to digital editing, training, or authorship. His symmetrical pose (balanced between analog and digital tools) visually communicates mastery of both worlds—old-school production and new-school postproduction. Background and Effects * The White House is faintly visible behind him—perhaps referencing his professional work in Washington, D.C., or government media production. * The horizontal motion blur suggests high-speed travel or data streaming, reinforcing the digital/media theme. * The grid overlay and cool-toned lighting hint at technology, precision, and design. * The lighting effect around Richard creates a halo-like glow, giving a sense of prominence or digital “aura.” Typography and Branding In the lower left corner, the text “RHED PIXEL” appears in a bold, grungy typeface—stylized as cut-out letters, resembling a tech or hacker aesthetic. This aligns with a creative production company identity—raw, modern, and media-driven. Color Palette and Mood The colors blend teal, amber, and magenta tones with motion streaks, evoking both warmth (human creativity) and coolness (digital precision). The soft glow around Richard emphasizes him as the focal point while blending naturally into the motion background. Interpretation This image appears to serve as: * A personal brand portrait for marketing or promotional purposes. * A symbolic representation of bridging film and digital postproduction. * Possibly an early 2000s–era design, given the typography, hardware style (older laptop), and Photoshop aesthetic—emphasizing Richard’s long-standing presence in the field of digital media education. OMG.... I love AI sometimes. Let's see if we can get any worse. First, I recropped a headshot to give it a bit more space. Using Generative Fill it added in some extra torso. I then ran the image through Photoshop 2025 Beta using the Gemini 2.5 model and the FLUX Context Pro. --- A — Cinematic Hybrid (edit of your original) “High-end cinematic portrait of a media producer holding a shoulder video camera and an open laptop, dramatic rim light, parallax teal/blue light washes, faint HUD grid, soft bokeh of Washington DC landmark, sleek modern tech aesthetic, realistic lighting, 8k, editorial, shallow depth of field, minimal yet futuristic UI overlays; maintain natural skin tones.” --- B — Creator/Instructor (studio) “Professional studio portrait of a creator/instructor with camera and laptop, modern creator workspace background with audio mixer and color panel, floating UI callouts (Color/Audio/Motion), clean lighting with softbox key, editorial color grade, 8k.” --- C — Legacy → Future (split-frame) “Split-diagonal composite portrait: left side archival DC/media motifs with subtle texture, right side modern studio neon edge lights, subject bridging both sides with confident pose, tasteful light sweep, minimalist tech design, 8k.” I have to say, I am not really sure what to think. AI has certainly gotten better at preserving facial details as you generate a new image. As illustrations, these work for me. Love to hear your thoughts
dlvr.it
November 22, 2025 at 10:03 PM
Come See Me at NAB Show New York 2025
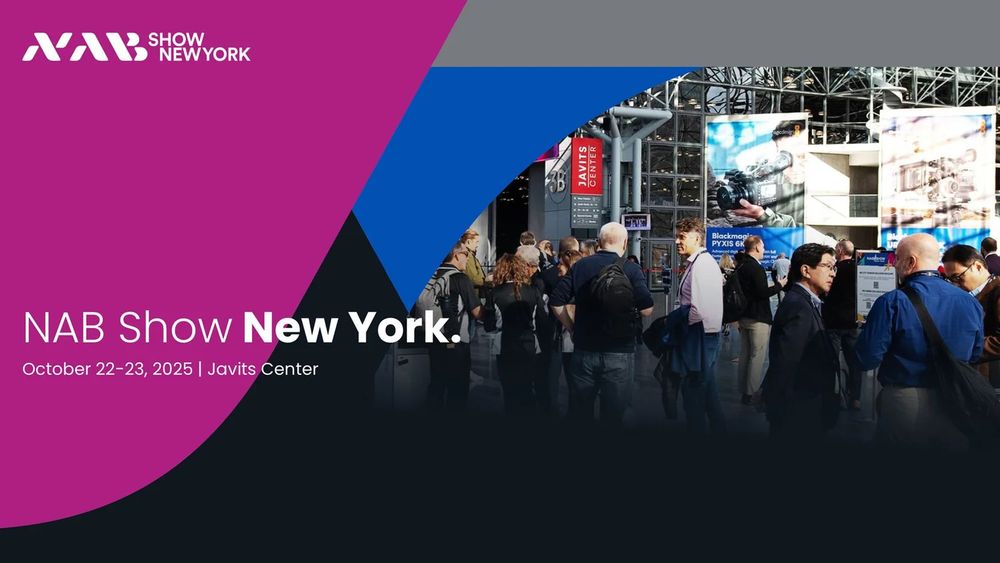
I hope to see you at NAB Show NY (October 22–23, Javits Center) I’ll be in NYC sharing the stage with some incredible voices as we dig into what’s next in media and entertainment—AI, content creation, production, monetization, and more. Grab your pass here: https://invt.io/1lxbc4q1vxs Use the code SPEAK for a free Exhibits Pass and 10% off conference programming. If you’re building your 2025 roadmap, consider this a smart stop—two focused days packed with tons of practical takeaways. Why swing by? If you make, move, or monetize content, NAB Show New York is the East Coast meetup to sharpen skills, compare workflows, and leave with ideas you can use immediately. You’ll find sessions, hands-on demos, and real talk from folks who ship on deadline. One of the largest sensors ever made - the footage is beautiful. Pro tip: swing by the FUJIFILM booth to check out the new GFX Eterna 55—a great way to see filmic color science in action. My Session Lineup (quick cheat sheet) Mastering Color Correction and Grading with the Lumetri Panel in Adobe Premiere Pro Oct 22, 2025 • 10:15–11:15 AM • 1E04 What you’ll walk away with: * A reliable “get it natural first” workflow (white balance → tone → saturation). * Comparison View for match moves and exposure fixes. * Curves, secondaries, split toning—plus saving grades as LUTs/Looks. * Managing Lumetri effects and keyframing clean, repeatable adjustments. * Fast rescues for over/underexposed shots and tasteful vignettes. You’ll leave with a step-by-step checklist you can reuse on every project. Bring a problem clip—this session is designed to help you fix it the right way and then push the look creatively. Producing on a Budget Oct 22, 2025 • 2:00–3:00 PM • 1E04 Make the numbers work for you: * Build accurate estimates, quotes, and invoices from day one. * Scope clearly, set payment terms, and track time so you actually get paid. * When to outsource, partner, or DIY—without sacrificing quality. * Rate setting that reflects people + gear + overhead (not guesswork). We’ll translate creative ideas into line items, so you can pitch with confidence and deliver without surprises. Expect templates, language you can copy-paste into proposals, and a realistic path to profit. Essentials of Timelapse Production & Post Oct 22, 2025 • 3:15–4:15 PM • 1E03 End-to-end timelapse, made practical: * Rock-solid capture: interval strategy, exposure control, sunrise/sunset challenges. * Creative techniques: composites, advanced masking, and motion feel. * Gear that matters (and what you can skip). * Post pipeline: RAW/JPEG development, deflicker, batch processing, retiming, and pro outputs. We’ll connect field technique to post so your sequences cut cleanly into client work. You’ll walk out knowing exactly how to plan, shoot, and finish a cinematic timelapse without wasting time or frames. From Story to Action: Strategic Content Creation and Social Media Oct 22, 2025 • 4:30–5:30 PM • 1E04 Turn ideas into outcomes: * Pick the right content model—Funnel, Whirlpool, Tent Pole, Long Tail, Spider Web, Fence Posts. * Platform-smart best practices (reach + retention). * Engagement to monetization: build offers, not just eyeballs. * Measure what matters and iterate with analytics. We’ll map story to strategy, then to a posting plan you can execute next week. The goal is simple: create content that travels further and pays for itself. Make the most of the show Ready to join us? Details and registration: https://invt.io/1lxbc4q1vxs Use SPEAK at checkout for your free Exhibits Pass and 10% off conference programming. See you at NAB Show New York, October 22–23, 2025—Javits Center.
dlvr.it
November 22, 2025 at 8:05 AM
The Long Game of Being a Creator
(My Process, Honed Over Decades) I didn’t start with a camera or a channel—I started with a copier. In college, I was producing flyers and putting on events, learning fast how words, images, and timing move people. That hustle turned into running a music magazine and website, where deadlines, layouts, and late-night interviews taught me the muscle memory of shipping. I’ve been publishing online for pretty much the life of the internet—long before social networks—and here’s the simple framework that’s never failed me. LISTEN Before you post, plug in. Participate in communities. Lurk a little. Observe how people ask, answer, and celebrate. Learn by being present first—what problems keep coming up, what sparks debate, which formats actually get consumed (not just liked). Try this: Spend one week only reading and bookmarking. No posting. Capture patterns and common questions in a notes doc. Pitfall to avoid: Jumping in with “hot takes” before you understand the room. FOLLOW Identify people and brands you admire. Pay close attention to what they do—cadence, format, voice, and the way they reply. Write down what you like (clear hooks, useful visuals) and what you don’t (clickbait, jargon). Try this: Build a “swipe file” with 10 posts you’d be proud to have made. Annotate why each works. Pitfall to avoid: Copying tone or format without understanding the strategy behind it. CURATE Start by picking great work to re-share. Curation is creation with training wheels—it sharpens taste and builds trust. Add a sentence or two of context: why it matters and who it helps. Try this: Once a day, share one resource with a 20–30 word takeaway. Tag the creator when appropriate. Pitfall to avoid: Mindless reposts. If you can’t explain the value in your own words, skip it. TRY TO HELP Participate in forums and communities with intent. Answer questions. Offer checklists, templates, or a quick how-to from your own experience. When your expertise overlaps someone’s need, show up. Try this: Block 15 minutes daily to answer two questions in a niche forum or group. Keep answers concise, link out sparingly, and follow up. Pitfall to avoid: Turning every reply into self-promotion. Help first; opportunities follow. ORIGINAL CONTENT Only after the previous steps. By now you’ve listened, followed, curated, and helped—so you’ve earned perspective and an audience that trusts you. Original content won’t feel daunting because you’ll know the problems worth solving and the formats that work. Try this: Ship one useful piece a week (thread, short video, or blog post). Use a repeatable structure: Hook → Problem → Steps → Example → Next Action. Pitfall to avoid: Aiming for “viral.” Aim for useful and consistent growth compounds. The Wrap My journey—from music magazine to decades of publishing online—taught me that creativity scales with empathy and reps. Listen → Follow → Curate → Help → Create. That order matters. Do the first four well, and the fifth becomes inevitable. Keep it simple, keep it honest, and keep shipping.
dlvr.it
November 22, 2025 at 6:16 AM
How Video Compression Works (Made Simple)
Uncompressed video is huge. A codec (compressor/decompressor) shrinks it for storage or streaming, then rebuilds it for playback. Codecs can be built into cameras/capture cards (hardware) or run in your editing/encoding apps (software). Quick terms: * Codec: the math (H.264, H.265, ProRes, DNx, AV1). * Container: the file wrapper (.mp4, .mov). * Bitrate: data per second (your quality/file-size knob). * GOP: the pattern of frame types the codec repeats. Two Ways We Shrink Video 1) Intraframe (within one frame) Each frame is compressed individually, much like saving a JPEG of every single frame. It’s easier to edit and color because every frame is self-contained (think ProRes or DNx), but files are bigger. Bonus: many codecs save fewer color details than brightness (called chroma subsampling, e.g., 4:2:0 vs 4:2:2). Done gently, viewers won’t notice. 2) Interframe (across many frames) Consecutive frames often look similar. Interframe compression saves one full frame and then stores only the differences for subsequent frames. * I-frames: full images (largest); good for seeking. * P-frames: predicted from earlier frames (smaller). * B-frames: predicted from before and after (often smallest). Example GOP: I B B P B B P … This is how H.264/H.265 gets small files for web and streaming. Tradeoff: harder on your CPU/GPU and sometimes a bit fussier to edit. What Controls Quality and Size? * Content type * Simple (talking head, static background): compresses easily. * Busy (sports, handheld action, confetti, water): needs more data or more I-frames. * Bitrate * CBR: steady data rate; predictable size (nice for live/strict specs). * VBR: spends more bits on tough moments; better quality per MB. * Keyframe distance * Rule of thumb: set around 1–2× your frame rate (e.g., 30–60 for 30 fps). Shorter = easier seeking and steadier motion; longer = smaller files on simple scenes. What to Use, When * Editing/mastering: Intra codecs (ProRes/DNx). Smoother timelines, bigger files. * Final delivery: Inter codecs (H.264/H.265/AV1). Smaller files, more CPU to decode. If your timeline is sluggish, make proxies (lighter edit-friendly copies) or transcode to ProRes/DNx. If it’s smooth already, you can cut native camera files. Simple Export Recipe (Premiere Pro) * Format: H.264 → .mp4 * Preset: High Quality 1080p (or the platform’s preset) * Bitrate: VBR, 2-Pass * Talking head: 6–10 Mbps * Mixed/light motion: 10–14 Mbps * Sports/fast action: 14–20+ Mbps (For 4K, start ~2–3× higher.) * Keyframe distance: 1–2× frame rate * Audio: AAC, 48 kHz, 192–320 kbps Always test a 10–15 second “worst-case” clip (fast motion, fine detail). If that holds up, the rest will too. Quick Fixes * Blocky motion/smearing → Raise bitrate, shorten keyframe distance. * Banding in skies → Raise bitrate; enable higher bit depth if available. * Choppy editing playback → Use proxies or ProRes/DNx. * Platform rejects file → Match its exact codec/container/level/keyframe specs. Bottom line: pick intra for fast, reliable editing; pick inter for compact final files. Adjust bitrate and keyframe distance to match how “busy” your footage is, and validate with a short test export.
dlvr.it
November 22, 2025 at 4:29 AM
5 Do’s and 5 Don’ts for Great Presentations
Tools don’t make great presentations—choices do. A hammer can build a roof or ruin a tooth. Slides are the same. Used well, they support your message. Used poorly, they pound your audience into submission. Let’s keep your audience engaged and pointed in the right direction. The 5 Do’s 1) Do—Keep it Simple Think of slides like highway signs at 75 mph: brief, legible, and unmistakable. Aim for one big idea per slide. If a slide needs a paragraph to explain it, it’s not a slide—it’s a handout. Target: ≤ 10 words per bullet, ≤ 5 bullets per slide, generous whitespace. Quick win: Set your slide master to larger default type (e.g., 28–36 pt for body, 44–60 pt for headlines). Bigger type forces clarity. 2) Do—Stay Consistent Consistency calms the brain so it can focus on your content. Lock your type hierarchy, colors, and placement (titles, footers, logos) in the master before you build. Target: 2 font weights (e.g., Regular/Bold), 1–2 brand colors + 1 neutral, repeatable margins. Pro move: Review in Slide Sorter (PowerPoint) or Light Table (Keynote). If any slide looks like it belongs to a different deck, fix it. 3) Do—Build for Your Audience & Format Design for how the deck will be consumed. * Live talk: Slides are visual anchors; you deliver the narrative. * Leave-behind: That’s a separate, document-style PDF with fuller text and links. * Self-guided deck: Use concise, complete thoughts and supportive visuals—still not a wall of text. Litmus test: If you won’t be in the room, can a first-time reader grasp the story in under 5 minutes? 4) Do—Keep Bullet Points Short and Clear Write bullets that complete a thought on their own. Avoid jargon and lonely buzzwords. Makeover: * ❌ “Synergy • Leverage • Disruption” * ✅ “Combine teams to cut cycle time by 30%.” Tip: Start bullets with strong verbs: Decide, Reduce, Launch, Measure. 5) Do—Use Beautiful, High-Quality Images Low-res images scream “paper plate at a wedding.” Choose clean, well-lit, relevant visuals that scale to full bleed without artifacts. Checklist: 3000+ px on longest edge, consistent color treatment, one visual focal point per slide. Bonus: If the image is the idea, let it fill the screen. Add a short caption in a corner—done. The 5 Don’ts 1) Don’t—Stuff Slides with Too Many Elements If everything shouts, nothing’s heard. Complex charts? Break them into a sequence: one finding per slide. Rule: If you need to say “I know this is hard to read,” the slide has failed. 2) Don’t—Build the Whole Deck from Bullets Endless bullet slides lull audiences to sleep. Mix formats: big statement slides, full-bleed images, simple diagrams, short quotes, and quick demos. Pattern to try: * Slide 1: Big idea (8–12 words) * Slide 2: Visual proof (image/graphic) * Slide 3: Action or example (1–3 bullets) 3) Don’t—Place Images Randomly Establish a layout grid (e.g., margins + two columns) and stick to it. Repetition creates rhythm and makes your content feel intentional. Tell: If captions, photos, and logos drift around from slide to slide, your grid has gone missing. 4) Don’t—Use Slides as Handouts A slide can’t serve two masters. If you cram every detail onto the screen, you force your audience to read instead of listen. Fix: Create a separate branded PDF with details, links, and references. Keep the on-screen deck lean. 5) Don’t—Overdo Word Art & Effects Drop shadows, bevels, and rainbow gradients are the MSG of slide design: a little can help; a lot makes people queasy. Guardrails: No more than one effect on type (usually: none). Favor contrast, size, and spacing over visual tricks. Common Pitfalls (and Fast Fixes) * Tiny charts: Rebuild as big, high-contrast figures. Label only what matters. * Wall-of-text slides: Move text to notes or handout; keep one summarizing sentence on-screen. * Random icons: Use a consistent icon set and size; align to your grid. * Inconsistent photo tone: Apply a simple global treatment (e.g., subtle desaturation or uniform contrast) for cohesion. Try This Mini Exercise Take any cluttered slide and make three versions: * Big Statement (one sentence, huge type) * Visual (full-bleed image + 8-word caption) * Action (3 bullets: problem → insight → next step) Deliver them in sequence. Watch attention snap back. Presentations are a performance, not a document. Keep the slides simple, the story tight, and the visuals strong. Your audience will thank you—with their attention.
dlvr.it
November 22, 2025 at 4:29 AM
Why Relationships Matter More Than Transactions
I’ve said it for years — “When they can choose, people do business with people they like and respect.” It’s a simple phrase, but it captures one of the most important truths about success in any industry. In a world filled with options, skill and price aren’t always the deciding factors. Clients, partners, and colleagues naturally gravitate toward people who make the process enjoyable and dependable. They want to work with professionals who not only deliver great results but also bring a sense of trust, ease, and mutual respect to the table. Liked Being “liked” doesn’t mean being a pushover or saying yes to everything. It means being approachable, collaborative, and easy to communicate with. It’s about treating people well — returning calls, showing appreciation, staying calm under pressure, and making others feel valued. Respected Being “respected” comes from consistency and competence. When you follow through, own your mistakes, and deliver what you promise, you build credibility that lasts far longer than a single project. Respect grows when people see that you’re reliable, ethical, and genuinely care about their success as much as your own. When you combine likability with respect, you build professional gravity — people are drawn to you, and they want to keep working with you. That’s when business stops feeling like a series of transactions and starts becoming a network of trusted relationships. Bringing It Home for Creatives For those of us in creative fields, this principle is especially true. Our work is deeply personal — it requires trust, vision, and collaboration. Clients don’t just hire us for our technical skills; they hire us because they enjoy the process of creating with us. When we focus on being both likable and respected, we build partnerships that lead to repeat work, referrals, and projects that everyone feels proud of.
dlvr.it
November 22, 2025 at 3:35 AM
Why I Use LinkedIn (and Why You Should Too)
Quick disclosure: LinkedIn has been a client of mine for almost a decade. Long before that, I was a fan of the platform. Today, I consider it essential. Not “nice to have.” Necessary—for visibility, credibility, and opportunity. People move around. Stay connected anyway. Great contacts change companies, titles, and emails. LinkedIn keeps the thread intact so you can reach people when it matters—no digging for old addresses, no guessing. If relationships drive business, you need a place where relationships persist. References matter—real proof beats claims. Resumes are promises; recommendations are evidence. Specific, thoughtful recommendations and project results help you judge skills quickly. Ask for them. Give them. If hiring or vetting partners is part of your world, this isn’t optional. Great groups cut through the noise. Groups are efficient learning and discovery engines. Join a few where practitioners share tactics, not just headlines. Contribute once a week with a short answer, checklist, or quick win. The right groups keep you current and visible without wasting time. Two or three degrees beats cold outreach. That “2nd” or “3rd” badge is a map. Warm introductions convert better, start faster, and feel human. Use mutual connections, shared work, or overlapping communities to open doors. If outreach is part of your job, you need this advantage. Targeted business news you can act on. Follow the right companies, people, and topics and your feed becomes a focused brief: leadership changes, funding, product shifts, hiring trends. Five minutes a day can sharpen proposals, timing, and strategy. You need signal, not a firehose. A great app that respects your time. Fast search. Easy voice notes. Smooth file sharing. Reliable events. The mobile app handles small tasks quickly—thank-yous after calls, links to case studies, quick follow-ups. If responsiveness builds trust, you need tools that make it effortless. Geographic awareness: work local, everywhere. Traveling or hiring beyond your area? Filter by city and connections to plan meetings or map talent. Local context drives better outreach and more relevant conversations. If your work crosses zip codes, you need geographic filters. It’s not just résumés. It’s proof of work. Profiles should read like compact portfolios: featured links, project snapshots, metrics, and how-you-think summaries. Keep it current. If people are checking you out before they call (they are), you need a profile that answers their questions fast. Search for jobs—or candidates—smarter. Use filters (title, skills, industry, location, remote) and save them. For recruiting, write concise, outcome-focused outreach. For your own search, align your headline and About to the roles you want. If growth is on your roadmap, you need structured search. See who’s thinking about doing business with you. Profile views, post engagement, and company page activity are soft hand-raises. Follow up with value: a short note, a helpful link, a relevant template. If pipeline matters, you need a system that surfaces intent. A simple weekly cadence * Post once: teach one specific thing you learned this week (≤200 words + example). * Comment twice: add useful, concrete comments to other people’s posts. * Message three people: one thank-you, one congrats, one resource share. * Refresh one tile: headline, Featured, or a project bullet. * Scan notifications: prioritize profile views and thoughtful comments for fast replies. Common pitfalls (and fixes) * Generic connection requests → Always add context and a reason to connect. * All win, no substance → Share process and lessons, not just outcomes. * Stale profile → Block 30 minutes monthly for a tune-up. * Unclear offer → State who you help, how you help, and outcomes you deliver. For parents: start your kids early If you’re a parent, help your kids get on LinkedIn as soon as they start working in high school—or at the latest, day one of college. Early use teaches real-world skills: how to introduce themselves, follow up, document results, and build relationships. Encourage them to connect with teachers, coaches, internship managers, and classmates; post short “what I built/learned” updates; and request specific recommendations (project, action, result). It’s not about “being polished”—it’s about learning to network, think through business, and build a reputation that compounds over time.
dlvr.it
November 22, 2025 at 3:35 AM
Managing Freelancers for Creative Projects—Without Burning Bridges or Budgets
I’ve hired and managed hundreds of freelancers—DPs, designers, editors, and illustrators. When it works, it feels like a great collaboration. When it doesn’t…well, you feel it in your budget, your schedule, and your stress level. This practical playbook will help you set freelancers (and yourself) up to win—respectfully and profitably. Before we dive into the day-to-day, zoom out. Every creative project lives inside the classic project triangle: Scope, Schedule, Budget—held together by Quality. You can’t max all four at once. As I teach in my project-management workshops: Good, Fast, Cheap—pick two. Balance those forces early and explicitly, or you’ll pay for them later. 1) Clear Expectations Think of expectations as your “contract culture.” Put them in writing, review them live, and reference them often. * Define the project in a concise Scoping Document (2–10 pages). Include objectives, deliverables, team roles, assumptions, constraints, evaluation criteria, budgets, schedules, and risks. This becomes the north star for everyone on the job. * Break the work into a Work Breakdown Structure (WBS). Keep splitting tasks until you can confidently estimate time and cost. Invite input from the client and your contractor so ownership is shared from day one. * Name success. What does “approved” look like? How many rounds of revisions? What is “done” for each task? Tighter definitions reduce noise later. Pro move: Start your kickoff by walking through the triangle (scope/schedule/budget) and your definition of “quality” for this project. Invite pushback. Capture decisions in the SOW addendum and share it immediately. 2) Job Rate vs. Hourly Rate Both can work; pick the model that matches your risk and clarity needs. * Job (fixed) rate shines when the scope is well-defined via your WBS and scoping doc. It rewards efficiency and gives clients price certainty. Build in assumptions and revision limits to protect margins. (Your scoping + WBS above is what makes fixed-fee safe.) * Hourly fits exploratory or open-ended phases (R&D, concepting, live-event contingencies). Pair it with caps and pre-approved blocks so the client never feels like the meter’s running without guardrails. * Regardless of model, use “In-Progress Reports” to show burn vs. budget and percent complete by task. It’s better to surface bad news early than to surprise anyone at the end. Tip: If you go job-rate, treat change as Change Orders—simple one-page addenda that list new work, cost, and impact on timeline. It keeps relationships warm and books clean. 3) Reporting Frequency Creative folks do their best work when they aren’t trying to guess what the client thinks. Regular, lightweight reporting is oxygen. * Agree on cadence up front (e.g., Mon/Thu DM, Friday status deck). Please put it in the SOW. * What to include each time: * What’s done (milestones hit). * What’s in progress (percent complete). * What’s next (with dates). * Risks/blocks and decisions needed. * Budget burn vs. plan (if you’re on a fixed fee, show “hours used vs. included” to prove control). Being proactive matters—don’t sugarcoat, don’t catastrophize. Be real. * Use simple tools—your accounting/time system, QuickBooks, or a dashboard—to keep numbers factual and repeatable. Micro-tip: Tie your reporting to the triangle—note any scope creep, schedule shifts, or budget pressure and how quality will be protected. Clients instantly get it. 4) Supervision (Without Micromanaging) Great freelancers don’t need hand-holding; they need access, clarity, and timely feedback. * Successful team start-up: agree on team purpose, roles, boundaries, ground rules, and logistics (tools, review windows, file naming). Do this once—together—so you can be hands-off later. * Prime communication behaviors: take responsibility, follow through, listen actively, communicate clearly, and give/accept feedback. Model these yourself; you’ll get them back. * Make approvals fast and unambiguous. Fuzzy feedback kills momentum. If multiple stakeholders exist, consolidate comments before they hit the contractor. * Protect maker time. Cluster feedback windows. Nothing slows a timeline like drip-feed notes at all hours. A Lightweight Toolkit You Can Use * One-page Brief (links to Scoping Doc): Goals, audience, deliverables, success criteria, schedule, budget, approvals. * WBS + Timeline: Tasks with owners and estimates. (This is where job-rate math lives.) * Status Template (weekly): Done / Doing / Next / Risks / Budget burn & % complete. * Change-Order Form: Triggered by any scope change; includes cost and schedule impact. * House Rules: File paths, naming conventions, review tools, response times, versioning. Common Pitfalls (and How to Avoid Them) * Assumptions left unspoken. Cure: write them into the scoping doc and review them live at kickoff. * “Sure, we can squeeze that in.” Cure: invoke the triangle, then a change order. Friendly, fast, written. * Reporting only when things go wrong. Cure: keep your pre-agreed cadence; early, realistic updates build trust. * Micromanaging the “how.” Cure: supervise the outcome, not every keystroke. You hired a pro—treat them like one. Set ground rules and let them cook. Final Thought You can never be too busy to manage a project. A simple, tactical approach—clear scope, appropriate pricing model, steady reporting, respectful supervision—turns contractor relationships into long-term assets for your business. If you put these habits in place, you’ll spend less time fighting fires and more time shipping great creative—on purpose.
dlvr.it
November 22, 2025 at 2:42 AM
Using ChatGPT to Monitor an Evolving Customer Conversation—in Near Real Time
When a client launched a premium product for high-end professionals, the first wave of reaction was “solid”… but confusing. Existing customers weren’t sure who it was for or why it existed. So I set up a near-real-time listening workflow with ChatGPT to sit in on the conversations people were already having—starting with Reddit. This post walks you through the exact prompt stack, the cadence, and the deliverables I used so your team can do the same. Why Reddit belongs in your listening stack A few brand-relevant realities: * Scale you can’t ignore. Reddit reported ~101.7M daily active users in Q4 2024 (and strong revenue growth), making it one of the largest places for product-focused talk on the internet. * Search visibility = fast discovery. Google added features like the Perspectives and Discussions & forums surfacing, which dramatically increased how often Reddit threads show up when people search—especially for product research. * SEO momentum. Independent analyses (e.g., SISTRIX) show Reddit became one of the biggest “winners” in Google visibility across 2024–2025—meaning your product’s Reddit threads are far more likely to be discovered during research. * Impact on consideration. Reddit’s own research shows that participating brands get more organic mentions and stronger ad performance; conversations are the new currency of trust. * Tighter ChatGPT integration. OpenAI’s partnership with Reddit gives ChatGPT real-time access to Reddit’s Data API—useful for timely topic understanding. (OpenAI) In our case, a discussion thread appeared as the #3 Google result within 3 hours of the product announcement—a perfect chance to watch the narrative form live. Watch an Evolving Discussion as it Updates Here’s the workflow I used—simple, ethical, and fast to deploy. 1) Start with the “live” thread Paste the link and ask ChatGPT to read it with working-pro attention: Prompt 1 — Sentiment + first readAnalyze this Reddit thread. Research the posters and add context with a focus on working professionals. Go deep, really think, spend at least 5 minutes and analyze the sentiment and key read of audience opinion. What it returned (and what marketing needed): * Sentiment snapshot (overall + by theme) * Positive/negative first impressions (to adjust messaging and social copy) * Representative quotes (to humanize the feedback) 2) Profile the conversation—ethically We’re not doxxing; we’re looking at public Reddit context only (posting history patterns, self-described use cases, subreddits frequented). Prompt 2 — Who’s talking?Dig deeper and attempt to understand more about who’s making posts. Identify the most active posters and summarize publicly visible context: - Are they power users of our category? Which brands do they usually favor? - Do they appear to be working professionals or hobbyists (based on language, subreddits, and self-described roles)? - What problems do they repeatedly mention? Why this matters Your messaging shifts when you see who’s actually debating the product: consultants vs. students, IT admins vs. prosumers, etc. That targeting clarity helps your copy, your landing pages, and your media prep. 3) Extract FAQs—including sales blockers Prompt 3 — FAQs & blockersBased on this Reddit thread (recheck it), what are the top FAQs—including those blocking sales? Group them into: - Pre-purchase questions - Fit/compatibility concerns - Confusions about positioning - Objections (price, workflow, alternatives) What we got * A prioritized FAQ list * “Blockers” we could address via social replies, landing-page updates, and sales enablement 4) Track the conversation over time Once the initial dust settled, I wanted to see if the crowd’s mood would evolve as reviews landed and specs got clarified. Prompt 4 — Rolling updatesRecheck the same thread(s) and update the results of these prompts every 3 hours for the next 3 days. Present the information found and call out changes between each scan: - Sentiment trend (overall and by theme) - New FAQs or resolved confusions - Shifts in who’s posting (pros vs. general users) - Notable quotes with permalinks I let that run the whole weekend. By Monday, we had a clear before/after read: what landed, what didn’t, and which answers cooled down objections. Deliverables the team can use on Monday morning I package outputs into three outputs: Sentiment & Theme Tracker * Overall sentiment over time * Top themes with volume and direction (+/–/↔) * Representative quotes FAQ & Blockers Doc * Ordered by impact on conversion * Each FAQ has a one-sentence answer, a proof point, and an owner (web, social, PR, product) Action Plan * Social strategist: content map + reply templates * Web team: UX fixes (comparison chart, spec clarities, fit guides) * Spokespeople: anticipated interview questions + talking points The exact prompt stack (copy/paste) Use these as is, or drop them into your own “prompt library”: Starter (thread read):Analyze this Reddit thread for working professionals: Provide: (1) sentiment, (2) positive/negative first impressions, (3) 8–12 representative quotes with permalinks, (4) top 5 risks/opportunities, (5) confidence ratings. Who’s talking (public info only):Identify top posters by activity. Using only public Reddit context: - Typical use case & skill level - Brand affinities - Recurring problems Note ethical note: do not infer real-world identity. FAQs & blockers:Extract the top FAQs (including sales blockers). For each: proposed answer, supporting proof, and suggested channel (web, social, PR, product). Rolling updates (scheduled):Every 3 hours for 3 days, recheck the thread(s) and summarize changes since last scan: - Sentiment shifts - New FAQs or resolved confusions - Notable quotes - Recommended actions Deliver a delta-only update plus a rolling summary. Ethics & safety (non-negotiable) * Use only public Reddit information. * Paraphrase when quoting sensitive content; always link to the original comment. * Aggregate, don’t accumulate: store summaries, not raw personal data. What this gave our team * A clean sentiment read with quotes we could actually use. * FAQs and blockers that immediately informed web updates and sales talking points. * A content roadmap for the social strategist—rooted in what people were already asking. * Media-prep notes so spokespeople knew what questions were coming. Not bad research for 3 a.m. on my living-room couch—and a Monday morning deck the whole team could act on.
dlvr.it
November 22, 2025 at 2:42 AM
Keeping Clients Happy
In creative industries, your relationships matter as much as your results. Whether you’re producing videos, managing projects, or delivering digital content, client satisfaction is the fuel that keeps your business running smoothly. Over the years, I’ve learned that keeping clients happy isn’t about overpromising — it’s about being proactive, transparent, and consistently adding value. Open Communication Strong relationships are built on honesty. Be upfront about timelines, budgets, and challenges. If a project hits a snag, communicate early. Clients appreciate being kept informed rather than surprised. Open communication also means listening — really listening — to what your client wants, even when they might not have the words to describe it clearly. Frequent Communication Silence breeds uncertainty. Frequent check-ins, even short ones, go a long way toward building confidence. Send updates before clients have to ask. Let them know what’s in progress, what’s next, and where you might need input. Consistent contact demonstrates professionalism and helps prevent minor issues from escalating into major problems. Value-Added Services Think beyond the contract. Are there small ways you can make your client’s life easier? Maybe it’s delivering an extra social media cut, providing usage tips for delivered assets, or suggesting ways to repurpose content. These gestures reinforce that you’re invested in their success, not just your invoice. Debriefs After every project, take time to review what worked and what could be improved. Debriefs strengthen relationships and sharpen your process. They also signal to clients that you’re invested in continuous improvement — not just wrapping things up and moving on. Prompt Return of Assets Nothing sours trust faster than delayed deliverables. Make returning project files, licenses, or unused assets part of your wrap-up routine. When clients know they can rely on you for timely delivery, they’re far more likely to return for future work. Pass on Praise Up the Chain of Command When a client gives you positive feedback, make sure their boss hears it too. Sending a quick note to their leadership not only builds goodwill but also enhances your point of contact's reputation internally. It’s a win-win — and it reflects your professionalism and empathy. Be Seen as a Resource Ultimately, you want to be more than a vendor. Share insights, connect clients with valuable tools, and help them think strategically. When clients see you as a trusted resource, you become part of their long-term success story — not just a line item in their budget. Would you like me to make this sound more conversational (for a blog post tone) or more like a short keynote script you could use in a talk or video?
dlvr.it
November 22, 2025 at 2:42 AM
What if your favorite music history book looked like a comic?
That’s the audacious idea behind Theft! A History of Music, a graphic novel published by Duke University’s Center for the Study of the Public Domain. At first glance, it might seem like a quirky experiment — but dig in, and you’ll discover one of the smartest, boldest vehicles for communicating copyright, creativity, and culture in our digital age. Here’s why any creative professional should care — and maybe even get inspired. From Plato to Public Enemy — in panels Theft! is the brainchild of legal scholars James Boyle and Jennifer Jenkins, brought to life by artists Ian Akin and Brian Garvey. What’s remarkable is not just its ambition — to present a 2,000-year history of musical borrowing — but how effectively it does so. It’s got everything you want in a compelling narrative: * Scope — from medieval notation to modern sampling, from “mash-ups” to lawsuits over Blurred Lines. * Conflict — the tension between artistic borrowing and intellectual property restrictions is built in. * Visual storytelling — the creators translate complex concepts (notation, copyright law, sampling) into metaphor and imagery. The result? A story you can see as well as read. No small feat for legal and historical subject matter. Listen to the Music Why put law and music into a comic? Because our cultural literacy demands it. * Accessibility & Engagement Lawyers, academics, and policy wonks tend to talk in terms of statutes, precedent, and doctrine. That’s not wrong — but most people in creative fields don’t live there. Converting this into a graphic narrative makes the stakes more accessible to a wider audience. * Learning by association Visual metaphor, pacing, juxtaposition — these are powerful tools. The comic medium lets the creators show instead of tell, trusting readers to make connections. For instance, a motif of “borrowing” recurs across centuries and styles, across cultures, across law. * License as a message The comic itself is distributed under a Creative Commons (BY-NC-SA) license. That means you can download it, share it, even build derivative works (so long as it’s non-commercial and you maintain license and attribution). That’s not just a footnote — it’s part of the argument. * Sharpening arguments that matter to creatives If you’re a musician, filmmaker, designer, or writer, you live amid issues of sampling, remixing, licensing, rights, and “fair use.” This comic is rooted in exactly those debates — weaving in case law, aesthetics, economy. It doesn’t preach; it gives you historical depth, so your instincts are sharper. What creative pros should take away from this As someone who makes visuals and teaches creative people, here are a few “lessons in practice” from Theft!: 1. Match format to complexity If you’re trying to explain something complicated — a process, a system, a history — don’t feel forced into dense text. Comics, infographics, interactive media — these formats let people dwell in complexity without losing their way. 2. Let your medium echo your message By choosing a Creative Commons license and using open distribution, Theft! is not just telling the story of cultural sharing, it is an act of sharing. That coherency between form and content is rare and powerful. 3. Use visual metaphors to carry abstraction Many legal or conceptual ideas (like “public domain,” “derivative works,” “sampling”) are abstract. Illustrator choices — framing, transitions, symbolic elements — help the brain “feel” those abstractions. As creative pros, that’s a tool you should lean into more. 4. Don’t underestimate the hunger for stories Yes, the audience is niche (music + law). But people who care about creative rights, remixing, culture — they will show up. Give them something with narrative momentum. Treat them like intelligent readers, not passive consumers. 5. Open the door — invite reinterpretation Because the license allows derivative works and translations, Theft! can live beyond its original form. Someone could visually reinterpret it for a non-Western music tradition. Someone might adapt it into a video or an app. That’s design for longevity, not static control. Learn more Final thoughts As I read this piece, what struck me is how Theft! is a bridge. It bridges disciplines (law and art), forms (text and image), and audiences (academics, creative professionals, and curious readers). If you're a creative professional trying to navigate the tangled world of copyright, sampling, remixing, or just curious about how culture evolves, this comic is a must-read. And beyond that, it’s an inspiration: take your big, thorny idea. Find the right medium. Make something that doesn’t just explain, but inhabits the topic.
dlvr.it
November 22, 2025 at 1:19 AM
A Truly Amazing Comic (On Copyright)
If you’re working a creative career, here’s a gift that will save you stress, time, and possibly your project: Bound by Law? Tales from the Public Domain. It’s a comic book—yes, a comic—that explains the thorniest parts of copyright, fair use, and the public domain with clarity and humor. It was created by legal heavyweights Keith Aoki, James Boyle, and Jennifer Jenkins and published through Duke University’s Center for the Study of the Public Domain. Even better, there’s a free digital edition. Don’t sleep on this. (Duke Law School) Why I recommend it to emerging creatives (not just filmmakers): Get te Comic * It turns legal fog into a map. The book follows a documentary filmmaker navigating real-world copyright traps—incidental background clips, music in public spaces, artwork in the frame—and shows what fair use actually looks like in practice. It’s approachable, memorable, and grounded in cases you’ll recognize from day-to-day production. * It’s free to read, remix, and share legally. The Duke team has made digital versions available, including a full PDF and assets for translation and education. That openness is the point: learn the rules so you can make fearless work. * It’s respected across the industry. The expanded edition from Duke University Press brought the project to a wider audience and cemented it as a go-to reference for creatives who want to get it right. What you’ll walk away with * A plain-language understanding of what “fair use” is and isn’t, and how courts weigh it. * The difference between copyrighted content and the public domain, and how Creative Commons licensing fits in. * Practical ways to plan your shoot or project so you’re not stuck clearing a dozen impossible rights two days before delivery. More Resources How to use it (today) * Read the comic—it’s a quick, entertaining sit and far less painful than Googling legal blogs at 2 a.m. * Make a “clear-or-fair” checklist for your next project: music, signage, screens, artwork, trademarks, and quotes. If you can’t clear it, ask, “Is there a strong, documented fair-use rationale?” * Document decisions. Save screenshots, location notes, and your fair-use analysis. Professional is not just being right—it’s showing your work. * Teach one thing you learned to your team or peers. The best way to remember the rules is to explain them once. If the legal side of creativity has ever made you feel like you’re tiptoeing through a minefield, this comic hands you a metal detector and a map. Read it, mark it up, and keep a copy in your bag. Future-you—and your clients—will thank you. For more information, click here.
dlvr.it
November 22, 2025 at 1:19 AM
It’s Ease-y in Adobe After Effects
Keyframe easing is the candy of motion design—sweet, addictive, and best used with intention. The Ease assistants give you quick, natural acceleration and deceleration, and you can always refine the curve after the fact. What the Ease assistants do * Easy Ease — Gently eases into and out of the keyframe for smooth starts and finishes. * Easy Ease In — Slows into the keyframe, coming to a gradual stop. * Easy Ease Out — Adds inertia out of the keyframe, easing up from a standstill. Apply them via Animation > Keyframe Assistant > (choice) after selecting the keyframe(s). You’ll see the keyframe icon change shape to indicate temporal Bezier interpolation. Quick demo you can try now * Make motion: On a layer, set two Position keyframes (linear by default). * Preview: Do a RAM Preview (press 0 on the numeric keypad) and notice constant speed. * Ease it: Select the second keyframe and choose Animation > Keyframe Assistant > Easy Ease In. * Preview again: The layer now decelerates into the end point. You’ll also see more dots clustered near the last keyframe on the motion path—those dots indicate samples over time, so higher density = slower velocity near the stop. The spatial path stays linear; the temporal interpolation becomes Bezier for speed changes. Make it yours (fine-tuning) * Open the Graph Editor and switch to Speed Graph to see the ramp. * Select an eased keyframe and use Keyframe Velocity… (right-click a keyframe) to adjust Influence and Incoming/Outgoing Velocity for sharper or softer curves. * Easing works on any property—opacity, rotation, effects—not just Position. A 60-second “tasteful ease” recipe * Block your animation linear first to lock timing. * Apply Easy Ease to both ends; preview. * Nudge the curve: increase Incoming Influence on the end keyframe for a cushier landing; refine in the Speed Graph. * Flip on Motion Blur to sell the movement once the timing feels right. Pro tips & pitfalls * Don’t over-syrup it: Too much ease can feel sluggish—use stronger curves on short moves, lighter on long moves. * Ease selectively: Often you only need Ease Out on the first keyframe and Ease In on the second for classic “move-and-settle.” * Consistent character: Save favorite curves as Animation Presets to keep a unified feel across shots. * Mind the beats: Let audio or edit points dictate where you accelerate and coast—ease should serve rhythm, not fight it. Treat easing like seasoning—enough to enhance, not overwhelm. With a few well-placed assistants and a peek at the Graph Editor, your animation goes from mechanical to cinematic in minutes.
dlvr.it
November 21, 2025 at 4:51 PM
It’s Never Enough… and That’s Okay
If you do creative work for a living (or for love), you’ve met the “Houdini” problem. Because the boxes on our desks can do design, photos, video, code, and music, folks assume we can pull off miracles on demand—preferably by lunch. On the outside, you look like an artistic problem-solver. Inside? Sometimes you feel wrung out. Here’s the truth I’ve learned after a few decades in creative trenches: you are not a vending machine for ideas. Creativity is a blend of three ingredients you can actually manage: * your environment, * your tools and resources, and * your personal well-being. Dial those in, and the magic shows up more often. 1) Build an environment that invites ideas Bad rooms kill good thinking. I once had to concept inside a roaring factory—harsh light, harder mood. We survived because we arrived with a plan. Most days, though, you get to choose your setting. Make it yours. * Change altitude, change attitude. When you’re stuck, move. Walk. Stand by a window. Take a notebook to a different corner. Location switches your brain’s input. * Personalize your space. Put photos, sketches, clippings, or objects that remind you of why you make things. They’re not decoration; they’re prompts. * Know your high-creativity hours. Protect them. I do my best idea work late at night; you might be a 7 a.m. sprinter. Guard those windows like billable time. * Make it playful. A couple of toys or odd lamps are not childish; they’re pattern breakers your brain uses to connect dots. And when the room isn’t yours? Show up with a plan: a one-page treatment, a shot/task list, and a timer. Time boxes protect attention. (Project discipline matters; pros juggle scope, schedule, and budget daily—the “triple constraint.” Respecting those constraints creates room for quality. ) 2) Stock the right tools (and a deep pantry) Tools don’t make the artist—but they do remove friction. I keep two categories: Capture tools (for raw material): * A phone and a small camera live in my bag—photograph textures, patterns, typography, and light you like. Build your own reference library so you’re never starting from zero. * A flatbed scanner with a sheet of protective glass turns anything into a texture—paper, fabric, leaves. Rainy-day scanning sessions pay off for months. Development tools (for shaping work): * Build a library of presets, actions, styles, and looks you genuinely understand. Treat them like spices, not sauce. (Installing or managing presets and styles is simple—but keep them organized so you can reach for them fast. ) * Keep a shelf (or folder) of art books and tear sheets—type, color, layout, photography. Print has a longer history than most of our screens; harvest it. Pro tip: When editing photos, start clean. Wipe the lens, control the flash manually, tap-to-focus, avoid digital zoom, keep the shot steady, and ride exposure by hand. These small technical moves dramatically reduce post-work and protect creative energy later. 3) Protect the creator (that’s you) Your brain is your primary instrument. Treat it like an expensive lens. * Energy budgeting. You can’t do high-concept ideation, careful craft, and rapid client comms all at once. Batch similar tasks. * Constraints help. Limits (time, palette, format) spark inventive choices. Embrace them instead of fighting them. * Recovery is part of the process. Museums, books, long walks, teaching a workshop, or lurking in a professional forum—these inputs refill the well. * Keep it simple. Write and speak about your work like you would to a smart friend: clear, conversational, honest, with just enough wit. Jargon is a creativity tax. (That’s not my rule—it’s simply good copy discipline.) The Creative Hammer: a small, mighty kit * Analog: index cards, sticky notes, a thick marker (big strokes force big ideas). * Digital: a capture app you love, a notes app with fast search, and two preset libraries: one for speed, one for style. * Library: 3 books on color/typography/composition, 1 book of interviews with artists, a folder of ads or posters you admire. * Recovery: a playlist for deep work, a walk route, and one colleague you can call for a five-minute sanity check. Pitfalls (and easy repairs) * Endless collecting, no making. Put a timer on research. If you haven’t sketched by minute 20, you’re hiding. * Preset overuse. If a look is fighting your story, throw it out. Presets are starting points, not finish lines. * Over-polishing early. Prototype first, polish later. Separate idea-generation from finish-work. * Everything, everywhere, all at once. Choose a single outcome for this session: a page, a beat sheet, a color key, a thumbnail. Micro-assignments to strengthen your creative muscle * Room Reboot (30 minutes): add three personal touchstones to your workspace and remove three visual distractions. * Texture Hunt (20 minutes): shoot or scan 15 textures/patterns. File them in a folder you’ll actually use. * One-Rule Project (45 minutes): make something finished (not perfect) under one constraint: two fonts, one color family, three cuts, one metaphor—your pick. * Teach Once (15 minutes): write a short tip for your team or community. Teaching clarifies thinking. Final word Creativity isn’t a lightning strike; it’s a repeatable practice. Shape your space, sharpen your tools, and take care of the human doing the work. Do that, and you’ll stop chasing magic and start making it—on purpose.
dlvr.it
November 21, 2025 at 2:31 PM
Just What are Photoshop Scratch Disks?
When I teach Photoshop these days, one of the first questions that always comes up is: “How can I make it run faster?” Most folks assume the answer is to add more RAM — and yes, that definitely helps — but it’s not the whole story. Even with today’s systems having 32GB or more of RAM, Photoshop still relies on something called a scratch disk — a temporary workspace on your hard drive or SSD that it uses when memory runs low. What’s a Scratch Disk? Think of a scratch disk as Photoshop’s personal “overflow desk.” When you’re editing big files, stacking layers, running filters, or working with large panoramas, Photoshop temporarily writes data to your drive. This helps prevent slowdowns or crashes when system memory is fully utilized. Setting It Up * Go to Preferences → Scratch Disks or press Cmd + K on Mac / Ctrl + K on Windows, then choose the Scratch Disks category. * Check the drives you want Photoshop to use as scratch disks. * Restart Photoshop for the changes to take effect. Best Practices * Use SSDs if possible. Solid-state drives are dramatically faster than spinning hard drives. * Avoid your startup drive. Avoid using the same disk that runs your operating system, as it slows everything down. * External drives work too, especially USB-C or Thunderbolt SSDs. * Clear space regularly. Photoshop needs plenty of free space to breathe — at least 20% of your drive’s capacity. Photoshop automatically deletes its temporary files when you quit, or after a crash and relaunch, so you don’t have to clean them up manually. The Bottom Line Scratch disks might not sound glamorous, but they’re a key part of keeping Photoshop snappy and stable — especially when working with high-resolution images or large composites. So next time your system feels sluggish, check your scratch disk setup before you start shopping for more RAM. It’s one of the simplest — and most overlooked — ways to give your performance a serious boost.
dlvr.it
November 21, 2025 at 1:18 PM
Typography With Soul: Chank Diesel & The Free Font Graveyard
If you’ve been designing since the days of dial-up, you might remember stumbling onto Chank.com — a quirky corner of the web filled with fonts that didn’t just decorate your designs… they brought them to life. Who Is Chank Diesel? Chank Diesel Chank Diesel (born Charles R. Anderson) is one of the most influential indie type designers of the past few decades. Based in Minneapolis, Chank helped define what “playful” typography could look like long before it was trendy. His fonts have graced everything from Taco Bell ads to book jackets, CD covers, and national ad campaigns. But what makes Chank special — beyond the bold outlines and expressive letterforms — is his spirit. His fonts don’t feel like they came off an assembly line. They feel like they were drawn by hand, by someone who likes making things fun. If you have a Creative Cloud subscription, you can install his new fonts for free. A Typographic Time Capsule: The Free Font Graveyard Once upon a time, Chank offered a wide selection of free fonts on his site. Not just one or two, but dozens — wild, weird, experimental, and often unforgettable. Many of us in the design and video production world used them for early motion graphics, poster layouts, CD art, and client work that needed something different. Today, those fonts live in what he now calls the Free Font Graveyard — a tribute to creativity, community, and the joy of experimentation. Here’s how he describes it: “Chank’s Free Font Graveyard (formerly known as ‘Chank's Free Font Archive’) is a gallery of historic experimental and fun fonts that were once offered freely on the world wide web and now have been retired from distribution. These designs were created by designers from all over the world as a celebration of the joy of playful typography and the spirit of getting fun new fonts into the world to push the boundaries of modern font design.” Some fonts were hits. Others? Happy accidents. But all were made with intention — and with a generosity that shaped a generation of creatives. Why This Matters Now We’re in a world of sterile defaults. AI-generated design. Fonts optimized for maximum utility and minimal charm. But Chank’s archive reminds us that design can (and should) still have personality. His Free Font Graveyard is more than just a list of downloads that are gone — it’s a love letter to type. To bold ideas. To oddball choices. To creativity for the sake of it. Where to Visit the Graveyard While you can’t download the fonts anymore, you can visit the archive here: 👉 Chank’s Free Font Graveyard It’s a nostalgic stroll for those of us who came up through indie design circles — and a reminder to keep things weird, human, and fun in your work. Want to see samples in action? Try his Instagram. Long live expressive design.
dlvr.it
November 21, 2025 at 1:18 PM
Time Blocking: Master Your Schedule, Boost Your Productivity
In creative businesses, our calendars can quietly take control. Time blocking helps you reclaim your time. It adds structure without stifling creativity, ensures deep work gets prime hours, and keeps communication from consuming the entire day. I use this approach to protect editing time, ship client work predictably, and finish the day with a clear plan for tomorrow. What Is Time Blocking Definition Divide your day into clearly defined blocks of time. Each block is dedicated to a single task—or a small group of related tasks. No multitasking inside the block. Purpose Increase focus, reduce procrastination, and manage workload with intention rather than reacting to whatever pops up. Why It Works * Fewer context switches: Focus improves when you stay with one task from start to finish. * Real priorities first: High-impact work gets prime hours instead of whatever’s left. * Better forecasting: Repeating blocks teaches you how long tasks actually take. * Lower stress: A visible plan replaces a reactive day. How to Implement It 1) Identify Your Work Capture everything for the week in one list: client deliverables, meetings, planning, emails, asset prep, and breaks. 2) Set Priorities Label items High / Medium / Low based on business impact and deadlines. 3) Estimate Duration Give each item a realistic time window. If you’re unsure, add 25–50% to your first guess and include transition time. 4) Build the Calendar * Deep Work: 90–120 minutes * Support Work: 25–50 minutes * Buffers: 15–30 minutes between blocks * Naming: Verb + Object + Outcome (e.g., “Edit Act 1 — watchable cut”) 5) Set Boundaries Mark blocks as Busy, silence notifications during deep work, and share availability (for example, email windows at 11:30 a.m. and 4:30 p.m.). I also tend to hack my day. I’ll start an hour earlier (like 8 am) to get a jump when things are quiet. I sneak off in the afternoon to get a workout in at the gym, which helps burn off some stress. 6) Review and Adjust At the end of the day, note what you finished, what slipped, and why. Adjust future block lengths and placement accordingly. Sample Workday (9:00 a.m.–6:00 p.m.) * 9:00–9:15 — Plan the day; confirm priorities * 9:15–11:00 — Deep Work 1: primary deliverable * 11:00–11:15 — Buffer * 11:15–12:00 — Communication: email, Slack, approvals * 12:00–1:00 — Lunch/reset * 1:00–2:30 — Deep Work 2: secondary milestone * 2:30–2:45 — Buffer * 2:45–3:30 — Reviews/stakeholder feedback * 3:30–4:15 — Admin: invoicing, asset management, scheduling * 4:15–4:30 — Buffer * 4:30–5:30 — Deep Work 3 (Sprint): push one focused outcome to done (export, polish pass, proposal section) * 5:30–6:00 — Plan tomorrow; capture lessons learned; set the first block for the morning Why this layout works: Morning holds the most demanding work, mid-afternoon supports collaboration, and the late-day sprint closes loops so the next morning starts clean. Meeting-Heavy Variant (Also to 6:00 p.m.) * 9:00–9:15 — Plan the day * 9:15–10:15 — Meetings / standups * 10:15–10:30 — Buffer * 10:30–12:00 — Deep Work 1 * 12:00–1:00 — Lunch * 1:00–2:30 — Client reviews / stakeholder calls * 2:30–2:45 — Buffer * 2:45–3:45 — Deep Work 2 * 3:45–4:00 — Buffer * 4:00–5:00 — Communication & approvals * 5:00–5:30 — Admin: estimates, scheduling, billing * 5:30–6:00 — Plan tomorrow; queue assets/exports Tips That Keep It Working * Use tools you already check: Google Calendar or Outlook with mobile reminders aligned to blocks. * Batch similar work: Consolidate feedback reviews, calls, or estimates into a single window to streamline your workflow. * Timebox communication: Two short email/chat sessions beat all-day drip. * Include recovery: Short breaks sustain attention across the afternoon. * Move, don’t delete: If a block gets pre-empted, relocate it within the same day or week. Common Challenges and Practical Fixes Overbooking Leave buffers every 2–3 hours and a late-day catch-up block. Interruptions Create a floating support block for surprises. Share status: “Heads down until 11:00; available afterward.” Underestimating If tasks overrun regularly, increase their block size by 25–50% next time and keep a simple log of actual durations for repeatable work. Meeting Creep Cluster meetings into a single window. Ask for agendas; shift informational updates to async when possible. Weekly Review (10 Minutes) * Shipped: What moved the business forward? * Friction: Which blocks ran long and why? * Adjustments: Update estimates and reorder priorities for next week. * Placement: Schedule next week’s first Deep Work block before you sign off. Closing Time blocking is about being deliberate with your attention. Start with one deep work block tomorrow and protect it. As you collect a few weeks of data, your estimates sharpen, your schedule steadies, and your creative output becomes more predictable. That consistency is what clients notice—and return for.
dlvr.it
November 21, 2025 at 10:01 AM
Making an AI Decoder Ring (for Understanding Your Boss)
I promise it’s easier than this image makes it look… My son texted me the other day. I am so proud of him, as he juggles his last year of school, keeping his on-campus work-study job while also working 15 hours a week at a paid internship in his field. He was pretty upset He was struggling to keep everything straight (understandable). But it wasn’t really time management or motivation. It was comprehension. Dropping off my son for his senior year of college. Getting Personal My son is on the autism spectrum. Some ways that’s a superpower; in other ways, it can be harder—especially when it comes to understanding context or brief communication. He was struggling to keep up with the numerous Slack messages and brief emails about tasks. He often overlooked key steps, deadlines, handoffs, or requirements. And hey, I can relate… I make those same mistakes even with 35 years of work experience. My son is studying augmented reality, while also getting minors in psychology, artificial intelligence, and cybersecurity. So we put those skills to work and built a custom UI. First, we experimented with the prompts. The Decoder Ring Prompts We experimented with some prompts…. and to be honest, in writing this article, it made them even better (time for a 1.1 update) Instruction to the AI (paste this before the message): “Analyze this message and generate a to-do list of tasks. Format for clarity and keep good detail.” What to make (explicit outputs): * Do generate a confirmation note for Slack (friendly and concise). * Do make me a checklist. * Do list tasks in the correct order. * Do list any dependencies or handoffs I need to make. * Do capture any dates, deliverables, and formats mentioned. * Please call out any missing information as questions that I can paste back. * Please create a summary I can add to my timesheet Tone and guardrails: * Take your time and think. * Do not over-expand things. Focus on clarity and do not extrapolate. * Prefer short sentences and bullet lists. Copy-and-paste template (use every time): INPUT (paste the email/Slack thread here) OUTPUT FORMAT (always): Summary (2–3 lines) Task Summary for Report — 1 paragraph or 3–5 bullets (status, progress, blockers, next steps) Checklist — [ ] Step 1 … (ordered) Dependencies/Handoffs — bullets with owners Constraints — dates, formats, approvals Open Questions — short, numbered Draft Reply — 3–5 sentences I can paste into Slack/email Quality Checks — note any assumptions and convert relative dates to exact dates in my timezone --- This gave some really clear answers. His face lit up, and information was consistently extracted and formatted into a list to follow. Starter messages were there to communicate back with his boss. He knew to read the original request and the analysis twice (mistakes can happen). But things were so much clearer. You don’t have to go middle ages to keep things secure. A note on privacy (what we decided up front) * We use a paid ChatGPT account. * In Settings → Data Controls, we opt out of sharing content to improve the model for others. * We avoid pasting sensitive credentials; if we must, we redact. * For company data, we keep it in one workspace/account, not mixed with personal. Leveling Up — My son taught me something new (the “Project” move) Here’s the twist: after we got the Decoder Ring working, he taught me a better way to run it. He made a Project in ChatGPT. Think of it like a smart folder that remembers context only for this stream of work. Then he added our prompts as Project Instructions so we didn’t have to retype them. Now all it took was pasting in the conversation—the project knew to do the rest. On top of this, the project could even be set to limit its scope of analysis to only what’s in the project. Once you build it… keep using it. It will learn and build more context with every use. How to set up the Project (step-by-step) * Create it Open ChatGPT → Projects → New Project → name it: Boss Decoder Ring – [Team/Client/Course]. * Give it a brain Go to Project Settings → Instructions and paste this (you can keep it verbatim): ROLE & GOAL You are my “Decoder Ring.” For any pasted message (Slack thread, email, notes), you will: 1) Extract clear tasks as a checklist in logical order. 2) Show dependencies (handoffs, blocked steps, inputs needed). 3) Capture constraints (due dates, formats, sign-offs). 4) Flag ambiguities as concise, paste-ready questions. 5) Draft a confirmation reply in a friendly, succinct tone. TONE Calm, clear, and concise. No filler. No extrapolation beyond the source. OUTPUT FORMAT (always) Summary (2–3 lines) Checklist — [ ] ordered steps Dependencies/Handoffs — owners and timing Constraints — dates, formats, approvals Open Questions — numbered, yes/no where possible Draft Reply — 3–5 sentences I can paste into Slack/email Quality Checks — re-read source and analysis twice; convert relative dates to exact dates in my timezone; mark any Assumptions. * Use it For each new message, start a new chat inside the Project and paste the whole thread. Type: “Apply Project Instructions.” You’ll get your Checklist, Dependencies, Constraints, Open Questions, and a Draft Reply ready to paste. * Keep it scoped One initiative = one Project. When a new initiative starts, create a new one to prevent context bleed. But what’s great is that each prompt can actually reference other messages in the project, so it can keep those in context as it offers answers—pulling in key details like full names or past requirements and standards. * Lock down privacy (again, in the Project) Keep sensitive docs in this single Project. Don’t mix personal and client work. If you’re in a shared workspace, align with your admin on data controls. Yes, since I used generative AI to make this silly graphic, I did ask for a flying Pteranodon. You’re welcome, son… AI is here (an optimistic view) I've heard complaints that AI makes people lazy. What I’m seeing is different: AI makes clarity cheaper. It turns vague chatter into checklists, transforms “EOD?” into a real date, and drafts the two-sentence confirmation that prevents a two-week detour. That doesn’t replace hard work—it protects it. For neurodivergent folks like my son (and I’m pretty sure me), that clarity is access. For the rest of us creative types, it’s permission to stay in flow longer and panic less. The Decoder Ring isn’t a shortcut around thinking; it’s a shortcut around confusion. And when confusion drops, quality climbs. Build yours, paste in the next messy Slack thread, and watch what happens. Not magic—just a small, repeatable system that helps talented people do their best work, more often.
dlvr.it
November 21, 2025 at 8:14 AM
Let’s Talk About Speaking Rights (Reasonably)
I’ve been speaking at tradeshows and industry conferences for a long time (in fact, more than 25 years). I love teaching, making new connections, seeing new places, and giving back to the industry. That’s why I say yes to events. Lately, though, some speaker agreements have gone way past “promote the session” and straight into “hand over your life’s work.” I don’t think organizers are evil; I think boilerplate creeps, lawyers copy/paste, and people misunderstand intellectual property. This post is about drawing fair, polite, and workable lines—so events can market effectively and speakers can protect their livelihoods. Why I Speak * I like to help people. * It’s a great way to make new business connections. * I occasionally have the chance to travel to new places. * I want to give back to my industry. (That’s the heart of it. The $500 honorarium doesn’t come close to covering prep and travel; I’m there for the community.) What’s Reasonable These are table stakes—and I’m happy to agree to them in writing: * You can promote that I’m coming through various channels (email, web, social, schedule, signage). * You can record a short promotional interview with me for event marketing. * You can use my name, headshot, and bio on your website and materials to promote the event. * You can take photos and b-roll of my session for a recap and future event promotion. Clear. Limited. Fit for purpose. What’s Not Reasonable (and Why) Below are real excerpts from a recent agreement. I’ve included them exactly as written and added concise notes. “I grant to [event sponsor] the non-exclusive worldwide right to reproduce, transmit, display, publicly perform, and distribute to the public for sale or otherwise works that include such Materials. Rights granted to [event sponsor] may be assigned and/or sublicensed by [event sponsor].” * No end date. That’s a forever license. * Assignable/sublicensable. Why should a third party I’ve never met get to sell my content? --- “I waive any and all rights in, or claims for, compensation from [event sponsor], its licensees and assigns, for the exercise of the rights granted above.” * So I give you broad commercial rights to my intellectual property and agree to no compensation for any use? That’s not marketing; that’s a rights grab. --- “With respect to the Presented and Distributed Materials, To the best of my knowledge the Distributed Materials and the Presented Material do not violate or infringe on any copyrights, trademarks, patents, or other property rights or personal rights of others. When necessary, I have obtained written consents from those for [event sponsor] to use these materials as described above. I agree to be responsible for any valid claims of copyright infringement that are based upon the Presented or Distributed Materials. ” * It’s reasonable to warrant that my work is my work. * It’s unreasonable to demand written licenses for every illustrative screenshot, frame, or client sample, as if I were relicensing it for resale. Educational fair use and project-limited licenses do not equal “rights to resell.” * Surprisingly, you want me to give you the rights to do all this with no input from me, yet I'm also willing to take responsibility for copyright claims and legal fees. The Money Reality Yes, events need to monetize. Recording, editing, and hosting all cost money. As someone who’s authored many commercial courses, I get it. But there’s a fair way to do this: * Ask permission for revenue-generating uses. * Share revenue fairly if you sell my content. * Or, if the business case isn’t there, don’t make the recording. Simple. A Fair, Polite Middle Ground (Language You Can Paste) Use, adapt, or borrow these. They keep everyone protected and productive. 1) Marketing & Promotion License * Scope: Non-exclusive, worldwide, promotion-only. * Rights: Use my name, likeness, bio, session title/description, and short excerpts (≤2 minutes) of any recording strictly to promote the event (this year and next year). * Term: From signature until 18 months after the event. * No assignment/sublicense except to the event’s contracted marketing vendors solely for event promotion. 2) Event Archival Recording (Non-Commercial) * Organizer may record the live presentation for internal archival and onsite replay (e.g., overflow rooms or post-show recap reel not for sale). * No public posting of the full session without separate written permission. 3) Commercial Use (Optional, Opt-In) * If the organizer wants to sell or broadly distribute the session (VOD, bundles, memberships), that requires a separate addendum with: * Defined deliverables (what’s included). * Term (e.g., 24–36 months). * Territory. * Revenue share (e.g., net receipts split) or a defined buyout. * Audit and reporting rights. * Takedown clause at term end. * No sublicensing beyond the platform needed to host. A Quick Checklist for Speakers * Read the grant of rights: scope, purpose, term, territory, and transferability. * Strike “assign/sublicense” unless it’s limited to vendors for promotion. * Add a term (12–24 months for promo; defined term for any commercial license). * Separate promotion from commercialization. * Define compensation if any use goes beyond promotion. * Limit liability to your own materials and include mutual indemnities. * Request approvals for any public posting of full-length recordings. * Keep tone friendly. Most organizers will meet you halfway when it’s clearly explained. A Quick Checklist for Organizers * Say what you actually need. If it’s promotion, ask for a promotion license. * Use plain language. Speakers sign faster when they understand it. * Don’t demand perpetual, transferable rights to everything; it signals a rights grab. * Offer choices: “promo only,” “promo + free replay,” or “commercial license with rev share.” * Share upside if you sell the session. It builds goodwill and better content. Bottom Line I respect that the industry is changing, and I’m happy to evolve with it. I expect that when one party wants to make money using another party’s work in new ways, the revenue is shared fairly, or the usage is limited to promotion. If you need my permission to promote the event, just ask. I’ll gladly help. But please don’t ask me to give up my rights—forever—for no compensation. Let’s keep it reasonable, respectful, and sustainable for everyone.
dlvr.it
November 21, 2025 at 6:26 AM
Playing Fair: Business Ethics for Creatives
Tools got cheaper. Markets got louder. The barrier to entry dropped—and that’s good. Fresh talent brings fresh ideas. But lower barriers don’t excuse lower standards. If we want a healthy creative industry, we have to protect it with sound business practices. Translation: play fair, price sustainably, credit properly, and treat people (and their time) with respect. This isn’t gatekeeping—it’s stewardship. Jump in, contribute, and please… don’t piss in the pool. 1) Price Fairly (for the Long Term) Charge in a way that lets you survive and improve, not just win this week’s bid. * Know your costs: insurance, gear, software, studio, payroll, taxes, education, admin. * Be consistent: publish rate ranges, stick to them, and explain what’s included. * Value, not just hours: complex, high-risk, fast-turn work costs more. * Say no to unsustainable asks; today’s “cheap win” becomes tomorrow’s expectation. Quick gut-check: If this price became your average, would you still be in business in 12 months? 2) Don’t Do Spec Work Unpaid “tests,” “points,” or “deferred comp” erode the market and your confidence. * Offer paid discovery (a small, scoped engagement) instead of free concepts. * If you must build portfolio, do self-initiated projects or donate to vetted nonprofits—with clear terms and boundaries. * Remember: other professions don’t work free to “prove interest.” Neither should you. Script to decline spec: “Thanks for the opportunity. I don’t do unpaid concepts, but I can offer a paid discovery sprint to shape the brief and creative direction. Here’s a scope and flat fee.” 3) Compete Without Trash Talk Your only real competition is yesterday’s version of your work. * Don’t badmouth peers; it lowers everyone—including you. * Credit collaborators openly. Attribute stock, music, fonts, and references. * Never pass someone else’s work or ideas as your own. If inspired, cite and transform. 4) Contracts First, Romance Second Great relationships still need clear agreements. * Scope: what’s in/out, deliverables, versions, acceptance criteria. * Schedule: milestones, review gates, client response times. * Budget: fees, expenses, contingency, change-order process. * Rights: usage, territory, duration, exclusivity, credit. * Protections: deposits, kill fees, limit of revisions, liability caps, indemnities. One-line trade-off: “To add X, we can either move the date, adjust the budget, or remove Y—your call.” 5) Your Problems Are Your Problems Be the person people want to hire again. * Pay subcontractors on time—even if your client is late. Don’t push your cash-flow issues downstream. * Share POs and timelines with your vendors so they can plan. * If something slips, communicate early with options, not excuses. 6) Be Transparent About Tools & Licenses Creativity is fueled by resources—use them ethically. * Buy and track licenses for stock, fonts, plugins, and music. * Deliver a simple rights sheet with each project: what was licensed, for how long, and where. * If you use AI or third-party services, disclose how and what that means for rights and privacy. Rights summary (copy/paste): * Asset → License type → Territory → Term → Notes → Renewal date 7) Act More Like a Lawyer (and Still Make Art) You’re a creative professional. Standards apply. * Communicate clearly, document decisions, and confirm in writing. * Protect confidentiality and client data. * Keep promises. Missed a date? Own it and present a recovery plan. * Keep learning—craft and business. Common Traps → Better Choices * Race to the bottom pricing → Set sustainable rates; educate clients on value. * Spec work → Offer paid discovery or do self-funded portfolio pieces. * Trash talk → Compete on craft and service; give credit generously. * “Pay when paid” → Pay your crew on schedule; build contingency for cash flow. * Handshake deals → Use written scopes, change orders, and clear rights. * License fog → Track assets and send a rights summary at delivery. The Creative Ethics Pledge (Steal This) * I price for sustainability, not undercutting. * I decline spec; I propose paid discovery. * I respect peers and credit collaborators. * I use written agreements and honor them. * I pay my team on time—no excuses. * I license assets properly and disclose constraints. * I communicate early, honestly, and professionally. Playing fair isn’t just “nice.” It’s how you build a resilient business, attract better clients, and leave the industry stronger than you found it.
dlvr.it
November 20, 2025 at 5:49 AM
The Triple Constraint: Pick Two, Manage the Third
Every project lives inside a triangle: Scope (what we’re making), Schedule (when it’s due), and Budget (what we can spend). Learn to balance these and you’ll ship more, stress less, and keep clients coming back. There’s also a fourth force that binds the triangle: Quality—the standard you won’t compromise. Simply put: Good, Fast, Cheap… pick two. If one corner moves, at least one other must move to keep quality intact. Scope: Define “Done” Before You Start Question: What is the work that must be completed? * Write a deliverables list with versions and formats (e.g., “90s master + 3x 15s cutdowns, captions burned in, 1080p and 4K”). * Capture acceptance criteria (what “approved” looks like) and out-of-scope items. * Set change control: request → estimate time/cost → written approval → schedule update. Rule of thumb: If it isn’t written down, it’s a risk. Schedule: Dates Are Promises Question: What are the time constraints? * Build a milestone map (key dates, review gates, final drop). * Work backward from the deadline; add a buffer (10–15%) for reviews and fixes. * Publish a cadence (stand-ups, weekly status, review days) so feedback lands on time. If speed increases, either scope must shrink or budget must rise. Budget: Money, Hours, and Headroom Question: What are the financial constraints? * Track burn rate (hours/dollars used vs. planned) weekly. * Separate production from post; earmark a contingency (10%) for surprises. * When adds appear, use the trade-off sentence: “To include X, we can either (a) add $Y, (b) extend to DATE, or (c) swap out Z.” If budget drops, reduce scope or extend schedule—don’t quietly erode quality. Quality: The Glue That Holds It Together Quality is the standard you refuse to trade away. * Define a quality bar (style guide, resolution, audio spec, brand rules). * Set review gates with specific checks (story, technical, brand/legal). * Document “won’t ship if…” thresholds (peaking audio, compression artifacts, missing captions). Protect quality by adjusting scope, schedule, or budget—never the other way around. Common Traps (and Fixes) * Silent scope creep → Log every add; estimate before yes. * Wishful timelines → Add buffer and publish review dates. * Budget blur → Track hours daily; report weekly. * Quality drift → Use reference examples and a “won’t ship if…” checklist.
dlvr.it
November 18, 2025 at 7:55 PM
Draw Your Animation with Motion Sketch in Adobe After Effects
Sometimes the Pen tool feels too clinical. Motion Sketch records your hand-drawn movement in real time—position and speed—so layers inherit that organic, human wobble you can’t fake with linear keyframes. What Motion Sketch does It captures a motion path (Position keyframes) as you draw in the Comp panel, including your timing. Perfect for drifting lower-thirds, flying UI chips, or handwriting reveals that should feel alive. Set up for a clean capture * Magnification: Set the Comp viewer to 100% or higher so you’re drawing at true scale. * Work Area: Trim the Work Area to the duration you want to sketch. * Select your layer, then open Window > Motion Sketch. * In the panel, enable Show Wireframe for responsiveness and Show Background if you need visual reference. * If you have a tablet, use it—Motion Sketch loves a pen. Capture Speed (the secret sauce) Capture Speed controls how long you get to draw relative to the Work Area: * Work Area = 4s, 100% capture → you have 4 seconds to draw. * 50% capture → 2 seconds to draw (faster pass). * 200% capture → 8 seconds to draw (slower, smoother hand movement). No matter what you pick, the animation plays back in real time across that 4-second Work Area. Most artists prefer above 100% for smoother, more controlled lines. Quick start (try this in a minute) * Make a new solid or shape layer; select it. * Window > Motion Sketch → Set Capture Speed to 200% and Smoothing to taste. * Click Start Capture and draw in the Comp panel (tablet recommended). * Preview (0 on numeric keypad). You’ll see natural acceleration/deceleration baked into the keyframes. Sync to sound while you draw Animating to a beat? In Time Controls, enable the Audio button so you hear playback during capture. Ride the rhythm and let timing guide your strokes. Make it prettier (refine after capture) * Smoothing: If the path jitters, raise Smoothing in Motion Sketch or use Window > Smoother on the selected motion path. * Speed Graph: Open the Graph Editor to even out spikes without losing character. * Auto-Orient: For arrows/planes, set Layer > Transform > Auto-Orient > Along Path to have rotation follow your curve. * Motion Blur: Flip it on to sell speed and soften wiggles just enough. Pro tips & pitfalls * Zoom with intent: If your line strains off-screen, you’re probably not at 100%—reset magnification and try again. * Separate clean-up pass: Sketch once for shape, then adjust a few keyframes (or influence handles) instead of re-drawing endlessly. * Tablet pressure: Vary your hand speed, not the pressure—Motion Sketch captures timing, not stroke thickness. * Pen vs. Pen tool: If you need geometric precision after the fact, you can still edit the spatial Beziers like any other motion path. Motion Sketch is your shortcut to animation with personality. Draw it once, smooth it a touch, and let After Effects keep the vibe you put in with your hand.
dlvr.it
November 18, 2025 at 2:40 PM