


Ben Ryves
@benryves.com
Croydon-based web developer, retro gaming and computing enthusiast and electronics hobbyist
Good luck, would love to see it! :-) I started a project like this but my devices predate IrDA so I need to implement the 500kHz "Sharp" protocol, which seems to involve old, hard-to-find (expensive) chips and IR transceiver modules. For now I've stuck with a cable!
November 10, 2025 at 7:59 AM
Good luck, would love to see it! :-) I started a project like this but my devices predate IrDA so I need to implement the 500kHz "Sharp" protocol, which seems to involve old, hard-to-find (expensive) chips and IR transceiver modules. For now I've stuck with a cable!
I'll need to build a new battery pack. I'm also somewhat puzzled by what I think is the charging resistor, here designated R39Ω, but which is clearly a zero ohm resistor. One of the electrolytic capacitors was also installed backwards, so I'm not sure what's gone on here!

November 9, 2025 at 4:48 PM
I'll need to build a new battery pack. I'm also somewhat puzzled by what I think is the charging resistor, here designated R39Ω, but which is clearly a zero ohm resistor. One of the electrolytic capacitors was also installed backwards, so I'm not sure what's gone on here!
This is the second CP-10 I bought, the other one had completely corroded guts from the leaking battery. I swapped over the crystal and... it works? I would not expect a quartz crystal to fail, but apparently it had. I was expecting to have to start swapping blown chips. Hooray for simple fixes!
November 9, 2025 at 4:48 PM
This is the second CP-10 I bought, the other one had completely corroded guts from the leaking battery. I swapped over the crystal and... it works? I would not expect a quartz crystal to fail, but apparently it had. I was expecting to have to start swapping blown chips. Hooray for simple fixes!
However, when applying power the screen would sometimes flicker as if something was trying to drive it, though. By pure accident I found that when pressing a finger against the capacitors and quartz crystal a slowly flickering number would appear on the screen.
November 9, 2025 at 4:48 PM
However, when applying power the screen would sometimes flicker as if something was trying to drive it, though. By pure accident I found that when pressing a finger against the capacitors and quartz crystal a slowly flickering number would appear on the screen.
This is a Japanese device, so needs a centre-negative power supply. The charger socket is directly connected across the battery pack and power rails, using the battery as a voltage regulator, making this a very easy device to blow up with the wrong power supply.
November 9, 2025 at 4:48 PM
This is a Japanese device, so needs a centre-negative power supply. The charger socket is directly connected across the battery pack and power rails, using the battery as a voltage regulator, making this a very easy device to blow up with the wrong power supply.
The serial cable matches an IBM PCjr, thanks to /r/retrocomputing for spotting that and for pointing out that the Sinclair QL version originally included an adaptor in the box. I bodged together a DE-9 adaptor for use with my PC in the meantime, will need to build a Z88 adaptor too.

November 6, 2025 at 10:09 PM
The serial cable matches an IBM PCjr, thanks to /r/retrocomputing for spotting that and for pointing out that the Sinclair QL version originally included an adaptor in the box. I bodged together a DE-9 adaptor for use with my PC in the meantime, will need to build a Z88 adaptor too.
I'm not even sure what computer this is supposed to be used with! Listing said Sinclair QL but this isn't the right plug? The PCB marks the signal lines (RD and CTS) and I beeped them out to the plug. Old issues of Format and QL World provide clues to baud rate (1200) and some format escape codes.

November 6, 2025 at 1:07 AM
I'm not even sure what computer this is supposed to be used with! Listing said Sinclair QL but this isn't the right plug? The PCB marks the signal lines (RD and CTS) and I beeped them out to the plug. Old issues of Format and QL World provide clues to baud rate (1200) and some format escape codes.
This is a big (80 column) thermal printer, for what it's worth. Was quite dirty so wanted to clean before switching on in case debris jammed the mechanism. Can't find a manual so at a guess held down Paper Feed when switching on and it does a test print. Looks like it's working!

November 6, 2025 at 1:07 AM
This is a big (80 column) thermal printer, for what it's worth. Was quite dirty so wanted to clean before switching on in case debris jammed the mechanism. Can't find a manual so at a guess held down Paper Feed when switching on and it does a test print. Looks like it's working!
This is why I only use AV cables with antivirus protection. Can never be too careful!

November 5, 2025 at 3:43 PM
This is why I only use AV cables with antivirus protection. Can never be too careful!
YouTube's trying to ruin with its auto-dubbing feature which I wish you could disable (or at least flag which other languages I know or are trying to learn). One Dutch chap I watch kept having his English videos dubbed into American, I guess his accent was too strong...
October 29, 2025 at 7:30 PM
YouTube's trying to ruin with its auto-dubbing feature which I wish you could disable (or at least flag which other languages I know or are trying to learn). One Dutch chap I watch kept having his English videos dubbed into American, I guess his accent was too strong...
The printer, case, cables, tapes & charger still ended up cheaper than I was able to find a charger on its own and it was a fun restoration, even if the results aren't perfect. The melted "Remote" switch was also from the previous owner's wandering soldering iron, so glad to finish what he started!

October 27, 2025 at 1:25 PM
The printer, case, cables, tapes & charger still ended up cheaper than I was able to find a charger on its own and it was a fun restoration, even if the results aren't perfect. The melted "Remote" switch was also from the previous owner's wandering soldering iron, so glad to finish what he started!
As the switch connects R to GND I added a 100K resistor between the pin and the printer switch (VP) as a pullup and that seemed to do the trick. Seller mentioned trying to run the printer off its charger which might have damaged the CPU and printer - the Ni-CD battery acts as a voltage regulator.
October 27, 2025 at 1:25 PM
As the switch connects R to GND I added a 100K resistor between the pin and the printer switch (VP) as a pullup and that seemed to do the trick. Seller mentioned trying to run the printer off its charger which might have damaged the CPU and printer - the Ni-CD battery acts as a voltage regulator.
Also, on power up the printer would feed for 5 seconds then halt in a fault condition. I suspected a problem with the home position switch but this tested fine and the signal back to the CPU's "R" pin had good continuity. The printer would work fine when touching the R pin with a logic probe...
October 27, 2025 at 1:25 PM
Also, on power up the printer would feed for 5 seconds then halt in a fault condition. I suspected a problem with the home position switch but this tested fine and the signal back to the CPU's "R" pin had good continuity. The printer would work fine when touching the R pin with a logic probe...
After reassembly I found two faults; one is that the low battery light is dimly lit during any print operation. The transistor the previous owner had replaced was part of the low battery circuit; I'd put in a new transistor with lower hFE than the original spec part so that may be to blame.
October 27, 2025 at 1:25 PM
After reassembly I found two faults; one is that the low battery light is dimly lit during any print operation. The transistor the previous owner had replaced was part of the low battery circuit; I'd put in a new transistor with lower hFE than the original spec part so that may be to blame.
I'd given up on this repair when I found 2 of the elements in the print head were dead. Replacement print heads are very expensive; modern thermal printers use fixed horizontal heads with many elements (384) instead of moving vertical heads with few (7) elements. Still, a shame to leave it in bits!
October 27, 2025 at 1:25 PM
I'd given up on this repair when I found 2 of the elements in the print head were dead. Replacement print heads are very expensive; modern thermal printers use fixed horizontal heads with many elements (384) instead of moving vertical heads with few (7) elements. Still, a shame to leave it in bits!
The cones were in rough shape on the old solid axle - likely caused by using on a hub with cups damaged when the old axle snapped, causing uneven wear. Rebuilt with the balls and cones from the old quick release axle, seems to be running smoothly - just hope it lasts until I can afford a new wheel!

October 10, 2025 at 1:14 AM
The cones were in rough shape on the old solid axle - likely caused by using on a hub with cups damaged when the old axle snapped, causing uneven wear. Rebuilt with the balls and cones from the old quick release axle, seems to be running smoothly - just hope it lasts until I can afford a new wheel!
Pictures related and I really hope I didn't just give myself a hernia. Planning to transplant the axle and bearings from another wheel (with a damaged hub) for a short-term fix...


October 9, 2025 at 11:22 PM
Pictures related and I really hope I didn't just give myself a hernia. Planning to transplant the axle and bearings from another wheel (with a damaged hub) for a short-term fix...
All working now! The discolouration in the bottom corner of the CE-125 reveals where the battery leaked. I love this form factor, and these computers are a big upgrade over the PC-1211 but can actually fit in a pocket unlike the more powerful PC-1500. Well, maybe not when attached to the printer!

October 6, 2025 at 3:00 PM
All working now! The discolouration in the bottom corner of the CE-125 reveals where the battery leaked. I love this form factor, and these computers are a big upgrade over the PC-1211 but can actually fit in a pocket unlike the more powerful PC-1500. Well, maybe not when attached to the printer!
This example came with a microcassette still in it - handy for testing, and looks like this one has some of the previous owner's programs on it so I'll be interested to see what's on there. Looks like the belts I've stuck in there are about the right size at any rate!
October 5, 2025 at 8:07 PM
This example came with a microcassette still in it - handy for testing, and looks like this one has some of the previous owner's programs on it so I'll be interested to see what's on there. Looks like the belts I've stuck in there are about the right size at any rate!
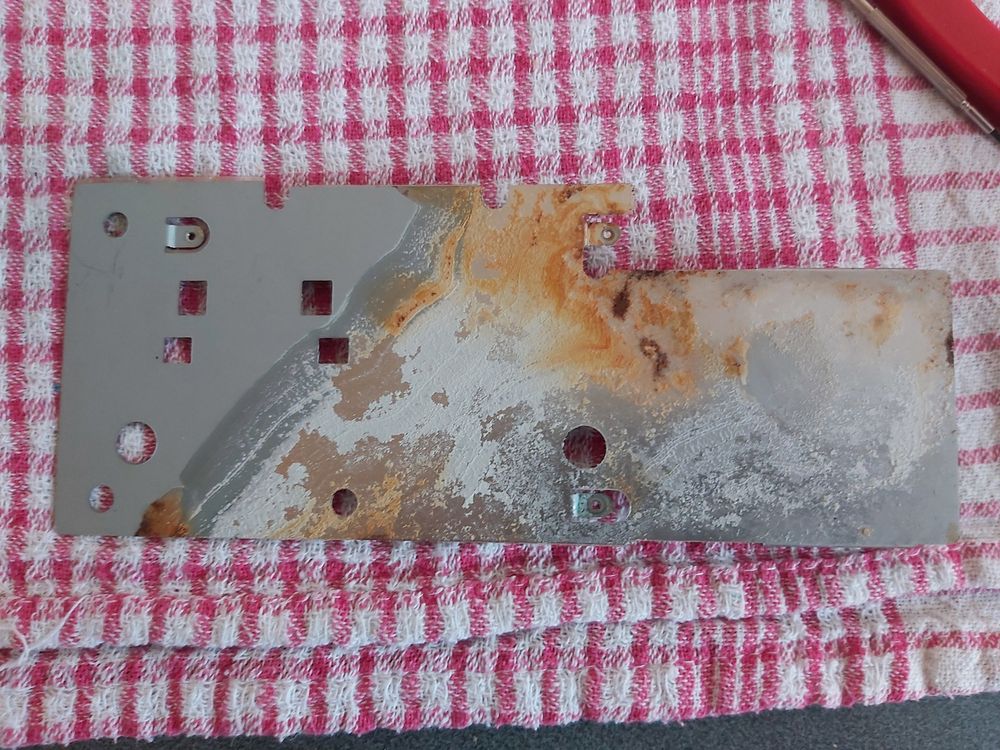
Not that anyone will see it, but pretty happy with how the metal shield cleaned up. Heat+acetone to remove the glued-on insulating plastic sheet, kettle descaler to knock off the rust, steel wool and T-cut to clean up discoloured rough spots and a coat of Hycote clear lacquer for good measure.


October 5, 2025 at 7:30 PM
Not that anyone will see it, but pretty happy with how the metal shield cleaned up. Heat+acetone to remove the glued-on insulating plastic sheet, kettle descaler to knock off the rust, steel wool and T-cut to clean up discoloured rough spots and a coat of Hycote clear lacquer for good measure.