


Ben Henry
@benhenry.bsky.social
Senior 3D Hard Surface Artist at Unknown Worlds working on Subnautica 2!
Opinions are my own. Prev @ Riot Games, Bungie, Valve Intern
Opinions are my own. Prev @ Riot Games, Bungie, Valve Intern
My face looking at this:

August 29, 2025 at 2:32 PM
My face looking at this:
For you and your special someone <3

February 15, 2025 at 1:19 AM
For you and your special someone <3
More shots of the final 3D printed prop I modeled and fabricated. I’m real happy with the result!


December 26, 2024 at 6:38 PM
More shots of the final 3D printed prop I modeled and fabricated. I’m real happy with the result!
And finally, after some resending and repainting, the prop is finished!
Lots learned here.
Lots learned here.


December 26, 2024 at 6:32 PM
And finally, after some resending and repainting, the prop is finished!
Lots learned here.
Lots learned here.
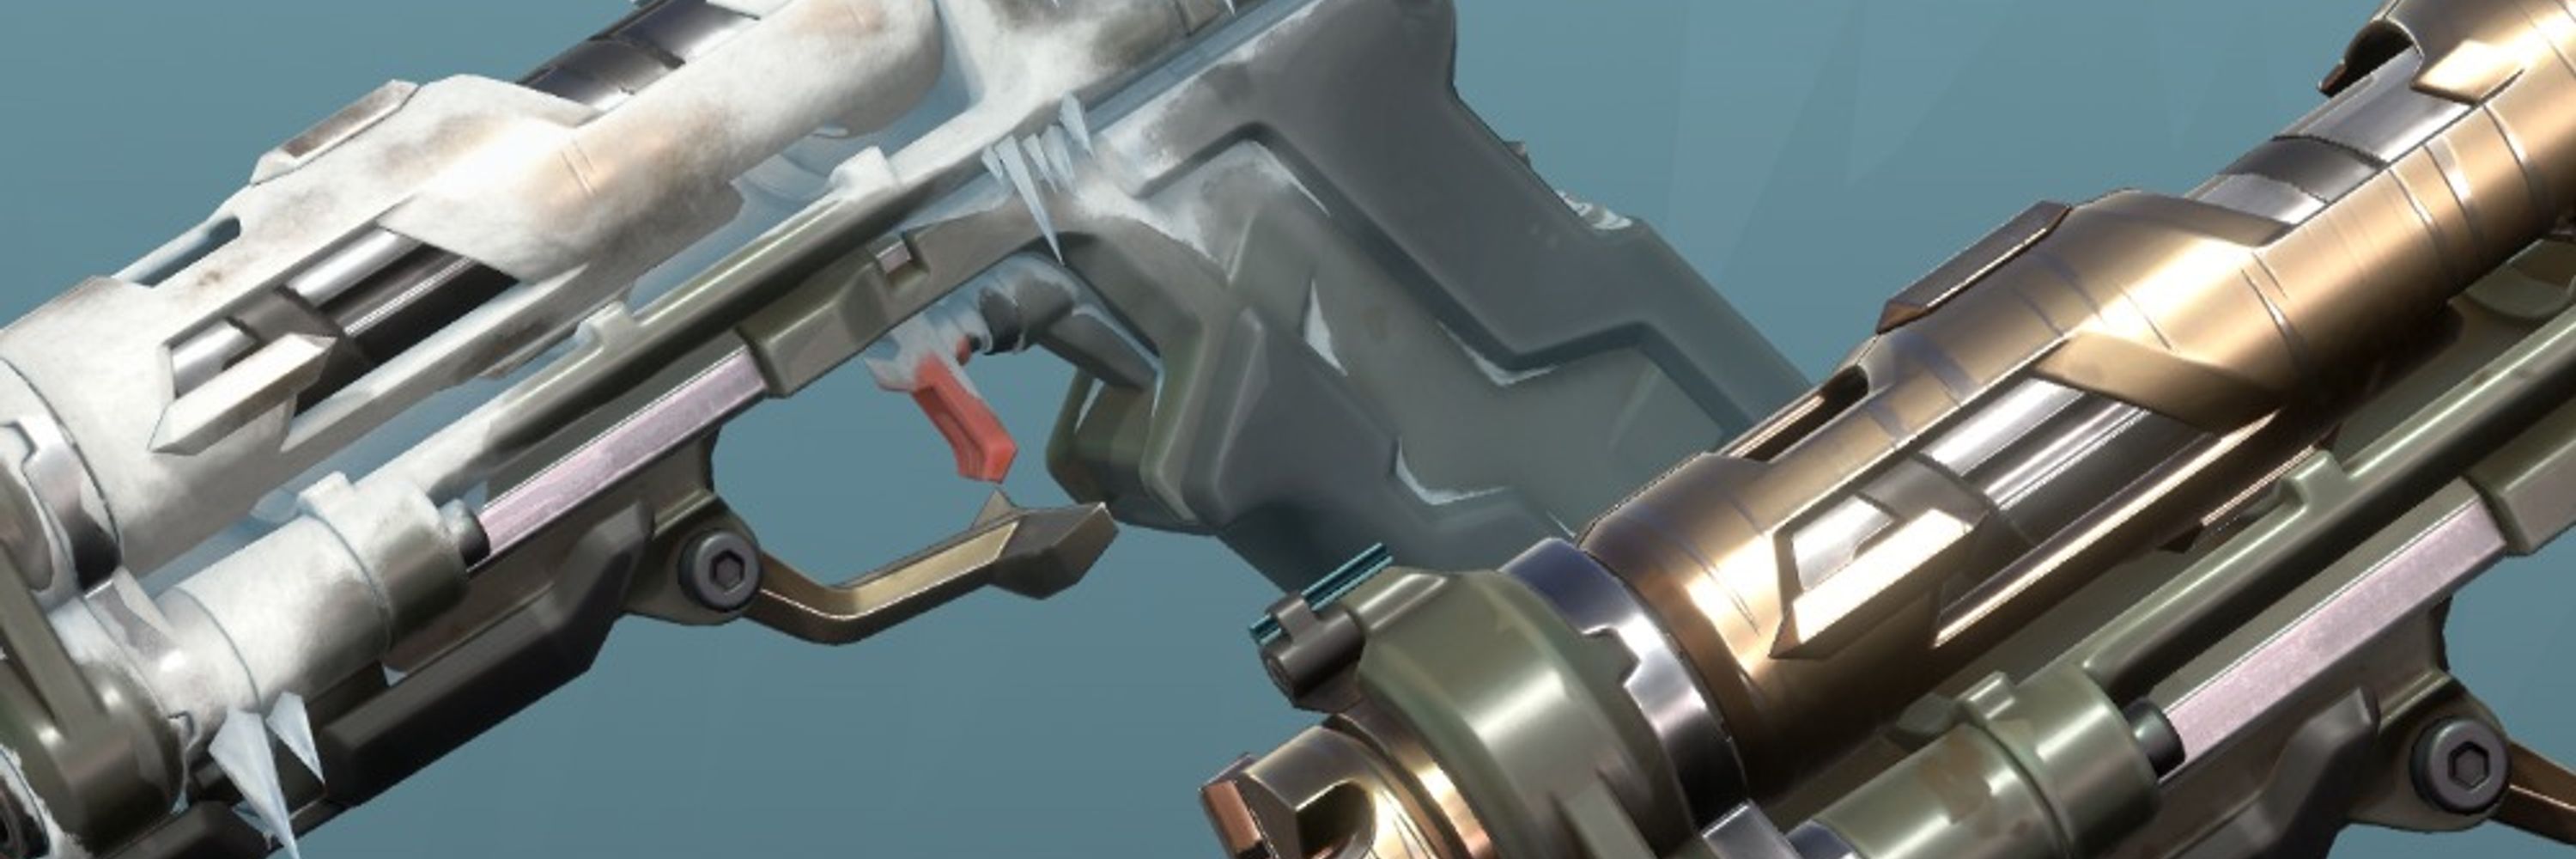
Man, I loved this one. I had so much fun with the shaders for the holo-ui, and the laser sight. I'm just so glad to have been tasked to make it!


November 23, 2024 at 1:16 AM
Man, I loved this one. I had so much fun with the shaders for the holo-ui, and the laser sight. I'm just so glad to have been tasked to make it!
One of my biggest breakthroughs with my art was this piece, Orion. Base off of a concept by Sheng Lam. I never considered it "final", since I was offered a job shortly after I posted it -- they noted this caught their eye. One day I'd like to go back and freshen this up. ~2019


November 18, 2024 at 5:55 PM
One of my biggest breakthroughs with my art was this piece, Orion. Base off of a concept by Sheng Lam. I never considered it "final", since I was offered a job shortly after I posted it -- they noted this caught their eye. One day I'd like to go back and freshen this up. ~2019
Posting some art from 2019. This was an art test, I had two weeks to recreate the reference image on the left. I still very much like this piece.

November 14, 2024 at 7:50 PM
Posting some art from 2019. This was an art test, I had two weeks to recreate the reference image on the left. I still very much like this piece.


Hey folks, I'm Ben Henry and I'm a Senior 3D Hard Surface Artist working on Subnautica 2 at Unknown Worlds. Previously at Riot on Valorant making weapon skins, and before that at Bungie modeling weapons for Destiny 2.
#art #artist #3d #Subnautica2 #gaming #Valorant #Riot #Bungie #Destiny2
#art #artist #3d #Subnautica2 #gaming #Valorant #Riot #Bungie #Destiny2


October 25, 2024 at 4:07 PM
Tonight, I sanded over those surface imperfections, used some filler on the more damaged or nicked surfaces.
I’ll have to wait until tomorrow to sand that down again, paint red, and then clearcoat it again.
So much learned. It’s been an incredible project so far.
#3Dprinting
I’ll have to wait until tomorrow to sand that down again, paint red, and then clearcoat it again.
So much learned. It’s been an incredible project so far.
#3Dprinting

October 25, 2024 at 7:21 AM
Tonight, I sanded over those surface imperfections, used some filler on the more damaged or nicked surfaces.
I’ll have to wait until tomorrow to sand that down again, paint red, and then clearcoat it again.
So much learned. It’s been an incredible project so far.
#3Dprinting
I’ll have to wait until tomorrow to sand that down again, paint red, and then clearcoat it again.
So much learned. It’s been an incredible project so far.
#3Dprinting
But the clearcoat had other plans.
The clamping of the parts left imprints. Scuffs and the micro detail of the rubber padding. Not so brilliant.
I had waited over 24hrs for the clearcoat to cure, but it wasn’t enough. #3Dprinting #Props
The clamping of the parts left imprints. Scuffs and the micro detail of the rubber padding. Not so brilliant.
I had waited over 24hrs for the clearcoat to cure, but it wasn’t enough. #3Dprinting #Props

October 25, 2024 at 7:17 AM
But the clearcoat had other plans.
The clamping of the parts left imprints. Scuffs and the micro detail of the rubber padding. Not so brilliant.
I had waited over 24hrs for the clearcoat to cure, but it wasn’t enough. #3Dprinting #Props
The clamping of the parts left imprints. Scuffs and the micro detail of the rubber padding. Not so brilliant.
I had waited over 24hrs for the clearcoat to cure, but it wasn’t enough. #3Dprinting #Props
I finally get to assembling all the parts, gluing this thing up and finding creative ways to hold it together. Thought I was near the finish line💪

October 25, 2024 at 7:14 AM
I finally get to assembling all the parts, gluing this thing up and finding creative ways to hold it together. Thought I was near the finish line💪
Btw if it’s not clear already, I was learning all this on the fly and losing my mind a little.
Cut to: many layers of clearcoat, sanding, buffing, etc!
Cut to: many layers of clearcoat, sanding, buffing, etc!


October 25, 2024 at 7:12 AM
Btw if it’s not clear already, I was learning all this on the fly and losing my mind a little.
Cut to: many layers of clearcoat, sanding, buffing, etc!
Cut to: many layers of clearcoat, sanding, buffing, etc!
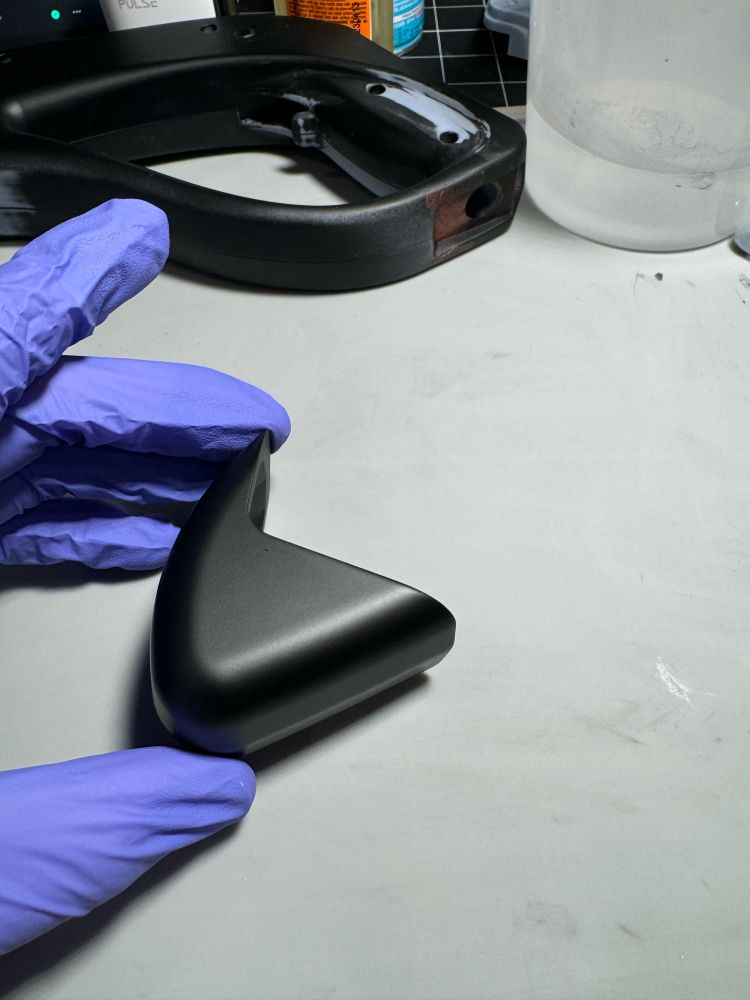
Then it was time to break out the glorious red paint and do the first few passes with the airbrush. Meanwhile not shown here, I printed the trigger and painted it black with a matte clearcoat.

October 25, 2024 at 7:05 AM
Then it was time to break out the glorious red paint and do the first few passes with the airbrush. Meanwhile not shown here, I printed the trigger and painted it black with a matte clearcoat.
So knowing I’d get into this more I purchased everything I needed to cast it, but I also couldn’t sit around. As a backup I printed the cap in 3 different translucent resins, and one of them turned out pretty great! Ignore the poor white balance of the photo, it’s a lot less yellow than it looks.


October 25, 2024 at 7:02 AM
So knowing I’d get into this more I purchased everything I needed to cast it, but I also couldn’t sit around. As a backup I printed the cap in 3 different translucent resins, and one of them turned out pretty great! Ignore the poor white balance of the photo, it’s a lot less yellow than it looks.
Here was the cap cast and mold. Terrible. Just awful.
As it turns out this is pretty tricky. Humidity in my basement workshop plays a huge role in the bubbling. To properly cast this I would have to have a dehumidifier, vacuum chamber, pressure chamber, and a large compressor.
As it turns out this is pretty tricky. Humidity in my basement workshop plays a huge role in the bubbling. To properly cast this I would have to have a dehumidifier, vacuum chamber, pressure chamber, and a large compressor.


October 25, 2024 at 6:59 AM
Here was the cap cast and mold. Terrible. Just awful.
As it turns out this is pretty tricky. Humidity in my basement workshop plays a huge role in the bubbling. To properly cast this I would have to have a dehumidifier, vacuum chamber, pressure chamber, and a large compressor.
As it turns out this is pretty tricky. Humidity in my basement workshop plays a huge role in the bubbling. To properly cast this I would have to have a dehumidifier, vacuum chamber, pressure chamber, and a large compressor.
Not knowing difficulty of the path ahead choosing to cast the cap, I pushed onward with some filler, sanding+primer until there weren’t any more visible flaws.


October 25, 2024 at 6:55 AM
Not knowing difficulty of the path ahead choosing to cast the cap, I pushed onward with some filler, sanding+primer until there weren’t any more visible flaws.
So back to the full body print, I sanded it for hours and hours. This was after a few coats of grey primer. I also printed the cap again in a better orientation and in fully opaque dark grey. The hope was to explore casting the print in clear urethane from a silicon mold…


October 25, 2024 at 6:51 AM
So back to the full body print, I sanded it for hours and hours. This was after a few coats of grey primer. I also printed the cap again in a better orientation and in fully opaque dark grey. The hope was to explore casting the print in clear urethane from a silicon mold…
Showing some failures here, I attempted to split the body into two parts and print them separately. I had some pretty intense distortion so I opted to go back to the full body print.
I also printed a version of the cap in transparent, and was really disappointed how much yellow tint it received.
I also printed a version of the cap in transparent, and was really disappointed how much yellow tint it received.


October 25, 2024 at 6:48 AM
Showing some failures here, I attempted to split the body into two parts and print them separately. I had some pretty intense distortion so I opted to go back to the full body print.
I also printed a version of the cap in transparent, and was really disappointed how much yellow tint it received.
I also printed a version of the cap in transparent, and was really disappointed how much yellow tint it received.
So here’s the first print of the main body. I was able to print it with auto supports, but there were slight distortions in the layer lines. It was close enough I decided to fix it in post (bad decision)
Takeaways: Use manual supports, and level your print bed.
Takeaways: Use manual supports, and level your print bed.


October 25, 2024 at 6:39 AM
So here’s the first print of the main body. I was able to print it with auto supports, but there were slight distortions in the layer lines. It was close enough I decided to fix it in post (bad decision)
Takeaways: Use manual supports, and level your print bed.
Takeaways: Use manual supports, and level your print bed.
I've been working on a project for making this Omega Timekeeper into a real prop. Model was made in #plasticity.
I'm 3D printing it, doing a bunch of post-processing. Lots was learned along the way, I'll post some IRL shots here tomorrow!
I'm 3D printing it, doing a bunch of post-processing. Lots was learned along the way, I'll post some IRL shots here tomorrow!


October 20, 2024 at 5:09 AM
I've been working on a project for making this Omega Timekeeper into a real prop. Model was made in #plasticity.
I'm 3D printing it, doing a bunch of post-processing. Lots was learned along the way, I'll post some IRL shots here tomorrow!
I'm 3D printing it, doing a bunch of post-processing. Lots was learned along the way, I'll post some IRL shots here tomorrow!